

Greetings fellow modelers! After 7 weeks on the bench, I have finally finished my entry into the Semper Defende: The Korean War Group Build 2023, and what a fun GB it was too. Honestly, if I can find the time, I might do another build, but for now, this will have to do.
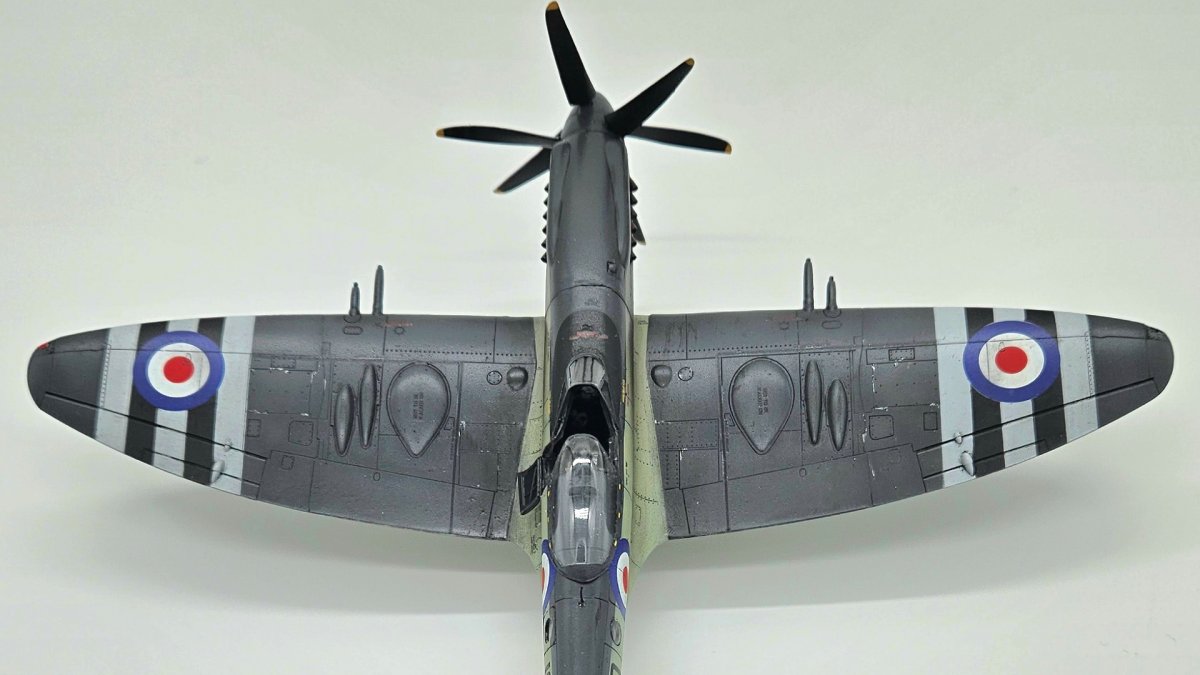
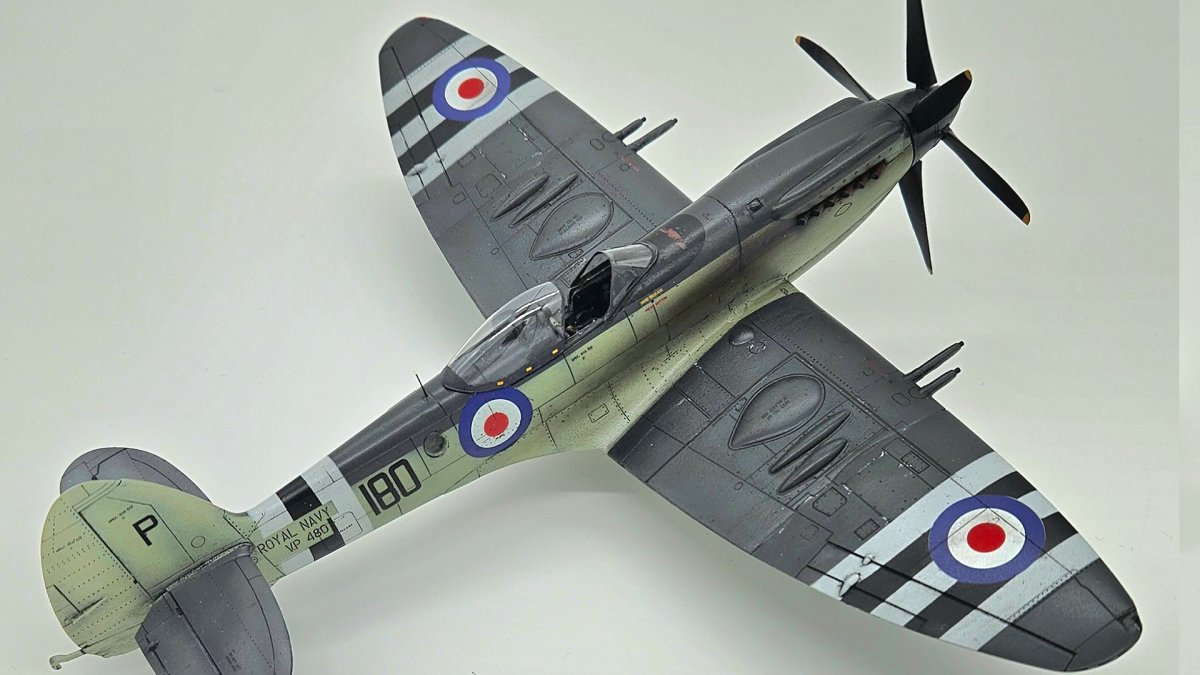
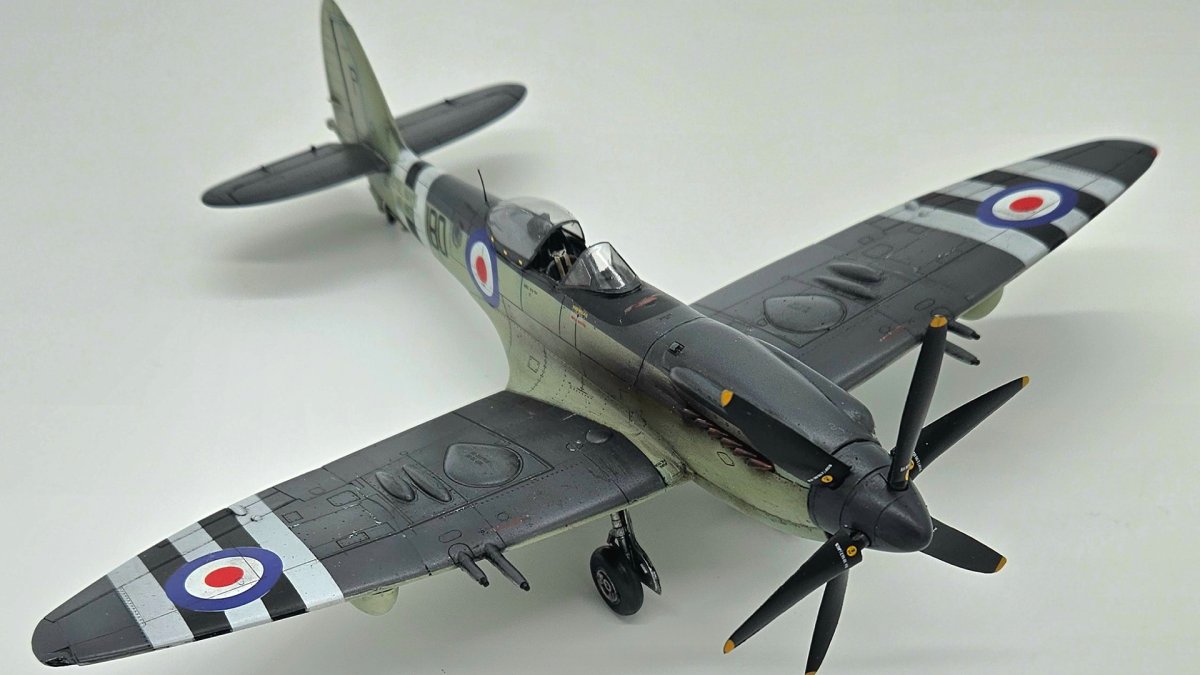
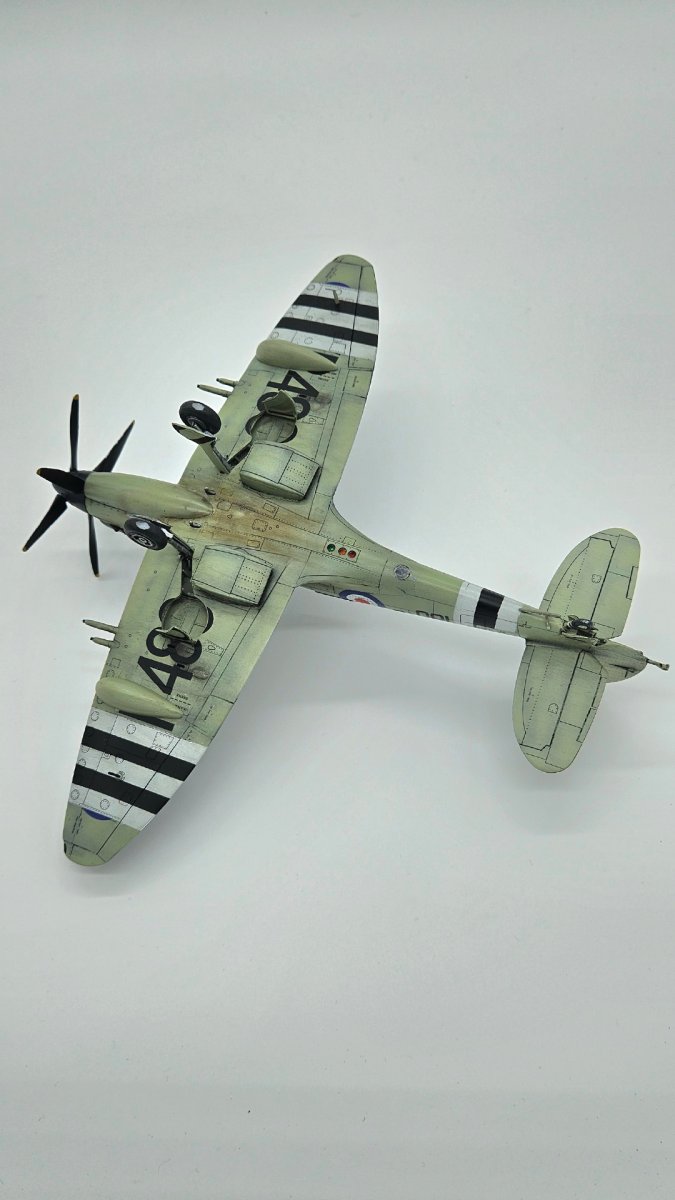
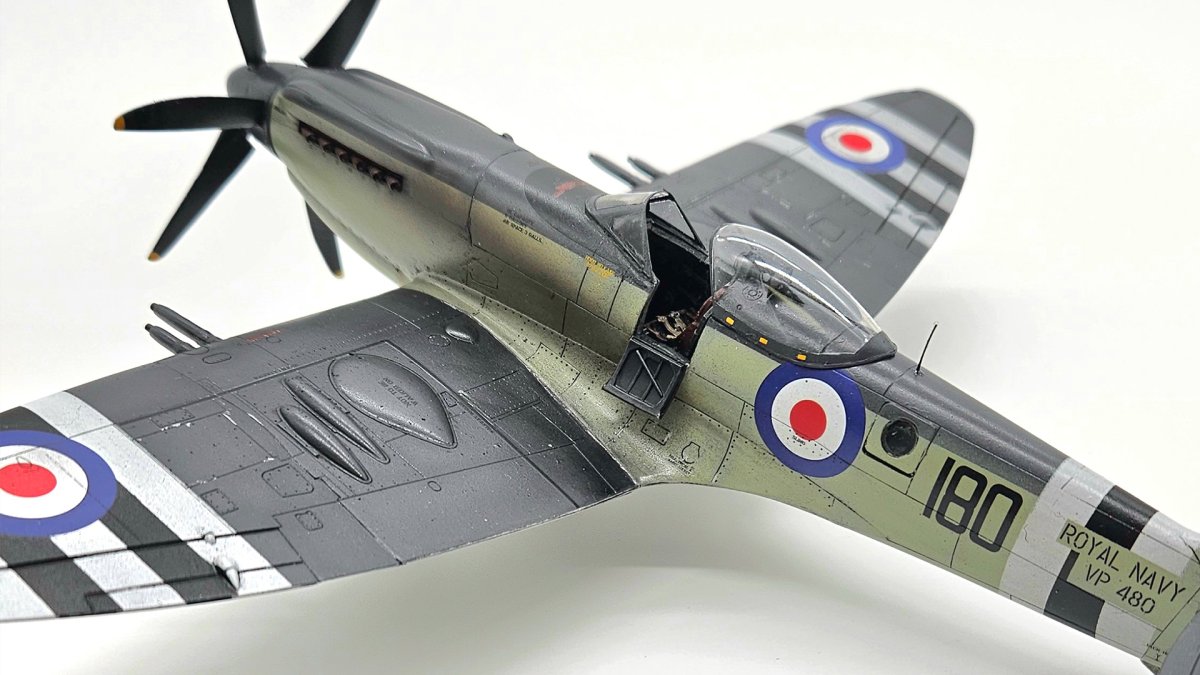
I decided to build the Supermarine Seafire FR.46/47 by Airfix. This was the 2012 re-release of their original 1996 offering and honestly, what a fun build this was. I had been looking for an excuse to build one of these late-mark Seafires and I figured that this was the perfect opportunity to give one a try. Since the Seafire FR.47 was actually used in the early days of the Korean War, I jumped at the chance to find one and build it up.
Unfortunately, none of my local stores had a Seafire in stock, so eBay to the rescue! Not only did I find a new kit, in great condition, but this kit also contained a resin cockpit set by Aries, a replacement cowling and exhaust set by Quickboost, a vacuform canopy by Squadron, and paint masks by EZ-Mask. What a deal! I have little experience with these types of replacement parts, but I thought I should give them a try and see what I could do. It was challenging for sure, but the results came out far better than I had expected.
For an older kit, the part fit was very nice. I only had a few issues to contend with, but most everything went together without any problems. I will note that the kit is designed to have the wings in the folded position, so since I wanted mine down, I had to work a little harder to get the parts to line up. Other than that, only the camera ports really gave me any additional pause.
As it turned out, it was the aftermarket sets that gave me the most hassle. Every set either had fit issues, size differences, shape issues or were just plain missing parts. For example, the resin cockpit set was missing the entire lower portion of the cockpit tub! Also, the replacement canopy’s windscreen was an entirely different shape, when compared to the kit part. I believe the replacement part was a bit more accurate, but the differences in shape made both the masks and decals not fit all the way.
But the worst offender of the build was the cowling replacement, which was around 2mm too short. I had to fill the resulting gap with styrene strips and super glue, then sand and re-scribe the entire area. I spent a good deal of time trying to fix that seam, but it still didn’t turn out the way I intended. I think the kit cowling would have been acceptable. I’m not sure that the resin replacements were worth all that effort.
Regardless of difficulties, this was a great experience. I’m still not sure if those upgrades were worth the time it took to install them, but I am glad I gave it a try. The kit scheme was painted using Tamiya Sky and Mr. Hobby Extra Dark Sea Grey. I decided to try and paint on the identification bands, so I masked with Tamiya masking tape and used Tamiya Flat White and Flat Black for the stripes. That was a nice touch, and it made the decals really pop!
Painting and weathering was a combination of oil paints, post-shading, and weathering powders. I tried exhaust staining and a bit of paint chipping as well.
Again, this was such a fun project. Here are a few images of the finished build. If you are interested, there is a full video series over on my YouTube channel. https://www.youtube.com/playlist?list=PLdtW56QfQrXgIeL2Xctas6UMMPF_ZdSTS
Thanks for looking and happy modeling!