

Manufacturer: Polar Lights
Scale: 1/2500th
Kit: #POL 967M
Build Series: Sci-Fi Wednesdays – 1/2500 U.S.S. Shenzhou (Completed)
Background
Over the course of my many years building scale models, I have only ever tackled a handful of Star Trek kits. Despite being a fan of both the T.V. shows and of the movies, I just never actively sought out those types of models. In fact, if memory serves, my brief foray into Star Trek kits took place between the years of 1991-1996. During those early years, I built the Enterprise A, a Klingon Battle Cruiser, the space station from Deep Space 9, and the USS Reliant, but that was it. After that, my interest in sci-fi models dropped off the face of the earth and I didn’t touch another Star Trek kit until 2017.
Like many of us, as a young modeler, I had a very different approach to building scale models. That means that my first Star Trek kits were all built very quickly, without lights, or special modifications, no azteking, no paint, no post-shading, no clear coats, no putty! I didn’t care about scale or accuracy, my only goal was to put them together as fast as I could so that I could go wage imaginary space battles in my living room. I don’t remember much about these kits, nor my experiences building them, but I do remember having loads of fun.
As I mentioned, I didn’t touch another Star Trek model until I tackled the USS Enterprise E, in 2017! Why the long pause you might ask? I honestly have no idea, it just kind of happened. Luckily for me, that Enterprise E project rekindled my love of Star Trek and I began acquiring more sci-fi models, re-watching many of the Star Trek movies and series, and taking a look at the newer Star Trek shows, like Star Trek Discovery.
Regarding the Star Trek Discovery TV series, people’s opinions vary wildly, but I am not here to debate the show’s faults or merits. It is safe to say that some people hate the show, while others absolutely love it. However, seeing as I am a scale modeler, I tend to focus more on the ship designs, rather than the drama surrounding the early seasons of the show. With that being said, one of my absolute favorite ships in the show is the USS Shenzhou. The Shenzhou gives me just the right amount of Reliant vibes, while still being a new design, that incorporates some neat visuals and interesting aesthetic choices. I actually like the ship a tad more than the series’ namesake, the USS Discovery. As you can imagine, when I found out that Polar Lights was bringing out a collection of Star Trek Discovery kits, in 1/2500th scale, I was pretty excited. I made it a point to grab a USS Shenzhou as soon as I could. (I actually ended up buying two!) I also acquired the USS Enterprise (a.k.a. the Disco-prise) in both 1/1000 scale and 1/2500th. So, in terms of the new ship designs, I am all on board.
The Kit
Starting off, I have to say that this kit was an absolute blast to work with. Although it is on the smaller side, since it is a snap kit, assembly is fairly easy and relatively quick. Parts are nicely molded and mostly flash-free. There are a few areas that will require a tad bit more cleanup, but nothing a few swipes of a file or a hobby knife wouldn’t fix. Unfortunately, the plastics are not as detailed as I would have liked to have seen, but Polar Lights gives the builder plenty of decals to make up for any lack of surface greebles. If you want even MORE detail, there is a wonderful photo etch set available from Greenstrawberry. This set adds loads of external detailing, new window openings, raised details, impulse engine grills, and even a shuttle bay! It is absolutely fantastic and highly recommended.
The decals are nicely printed and they combine all of Shenzhou’s azteking and registry numbers into large, one-piece sheets. Sheet-style decals can sometimes be difficult to apply, but these went on without any issues. They responded well to Micro Set/Micro Sol and conformed nicely to the curves of the kit. If I was going to nitpick, I might say that I would have preferred that the name and registry numbers be separate decals and not printed along with the aztek patterns, but honestly, that would have only been useful in a few very specific situations, so these are just fine for the majority of builders. The same can be said for the small, white dashes that are meant to represent windows found around the ship. I would have preferred an option for those to also have been separate. But these are not really issues and trying to achieve the intricate surface markings in this scale, would have been a labor of frustration, so decals are most welcome.
Kit construction is straightforward. As I mentioned, this is a snap-type kit, so the parts do not require glue for assembly. Since I was altering the internals on mine and adding in some extra parts, I ended up using Tamiya Extra Thin cement and some CA glue, to keep everything together.
Instructions are the typical black and white, perspective-type drawings, nothing too fancy really. They were easy to read, and they worked just fine. I didn’t notice any misprints or confusions, so they got the job done.
To display the finished model, the kit comes with a ball and socket-type, pedestal stand. I ended up replacing this one with one of my own creations, but it is nice to know that the kit comes with an easier option. Overall, it is a wonderful little model, that looks great once completed.
Construction
If you are building this kit right out of the box, construction is straightforward and super simple. It begins with the saucer section and after adding in a few clear parts for the impulse engines and the bridge, you close it all up and switch over to the secondary hull and the under-saucer supports. The nacelle assemblies follow that but be aware that their fit can be a little tricky, especially with the clear plastic inserts. Then the nacelles just clip into the supports, and you are ready for your next steps. Some minor sanding might be needed here and there, but it all goes together like a charm. Easy-peasy!
If you don’t want to take time to paint the ship, it is molded in color, so you could just simply apply the decals, seal it with a clear coat of your choice, and place it on the stand. However, I decided to take my kit a bit further and add lights and a PE set, so I had a slightly different order of operations.
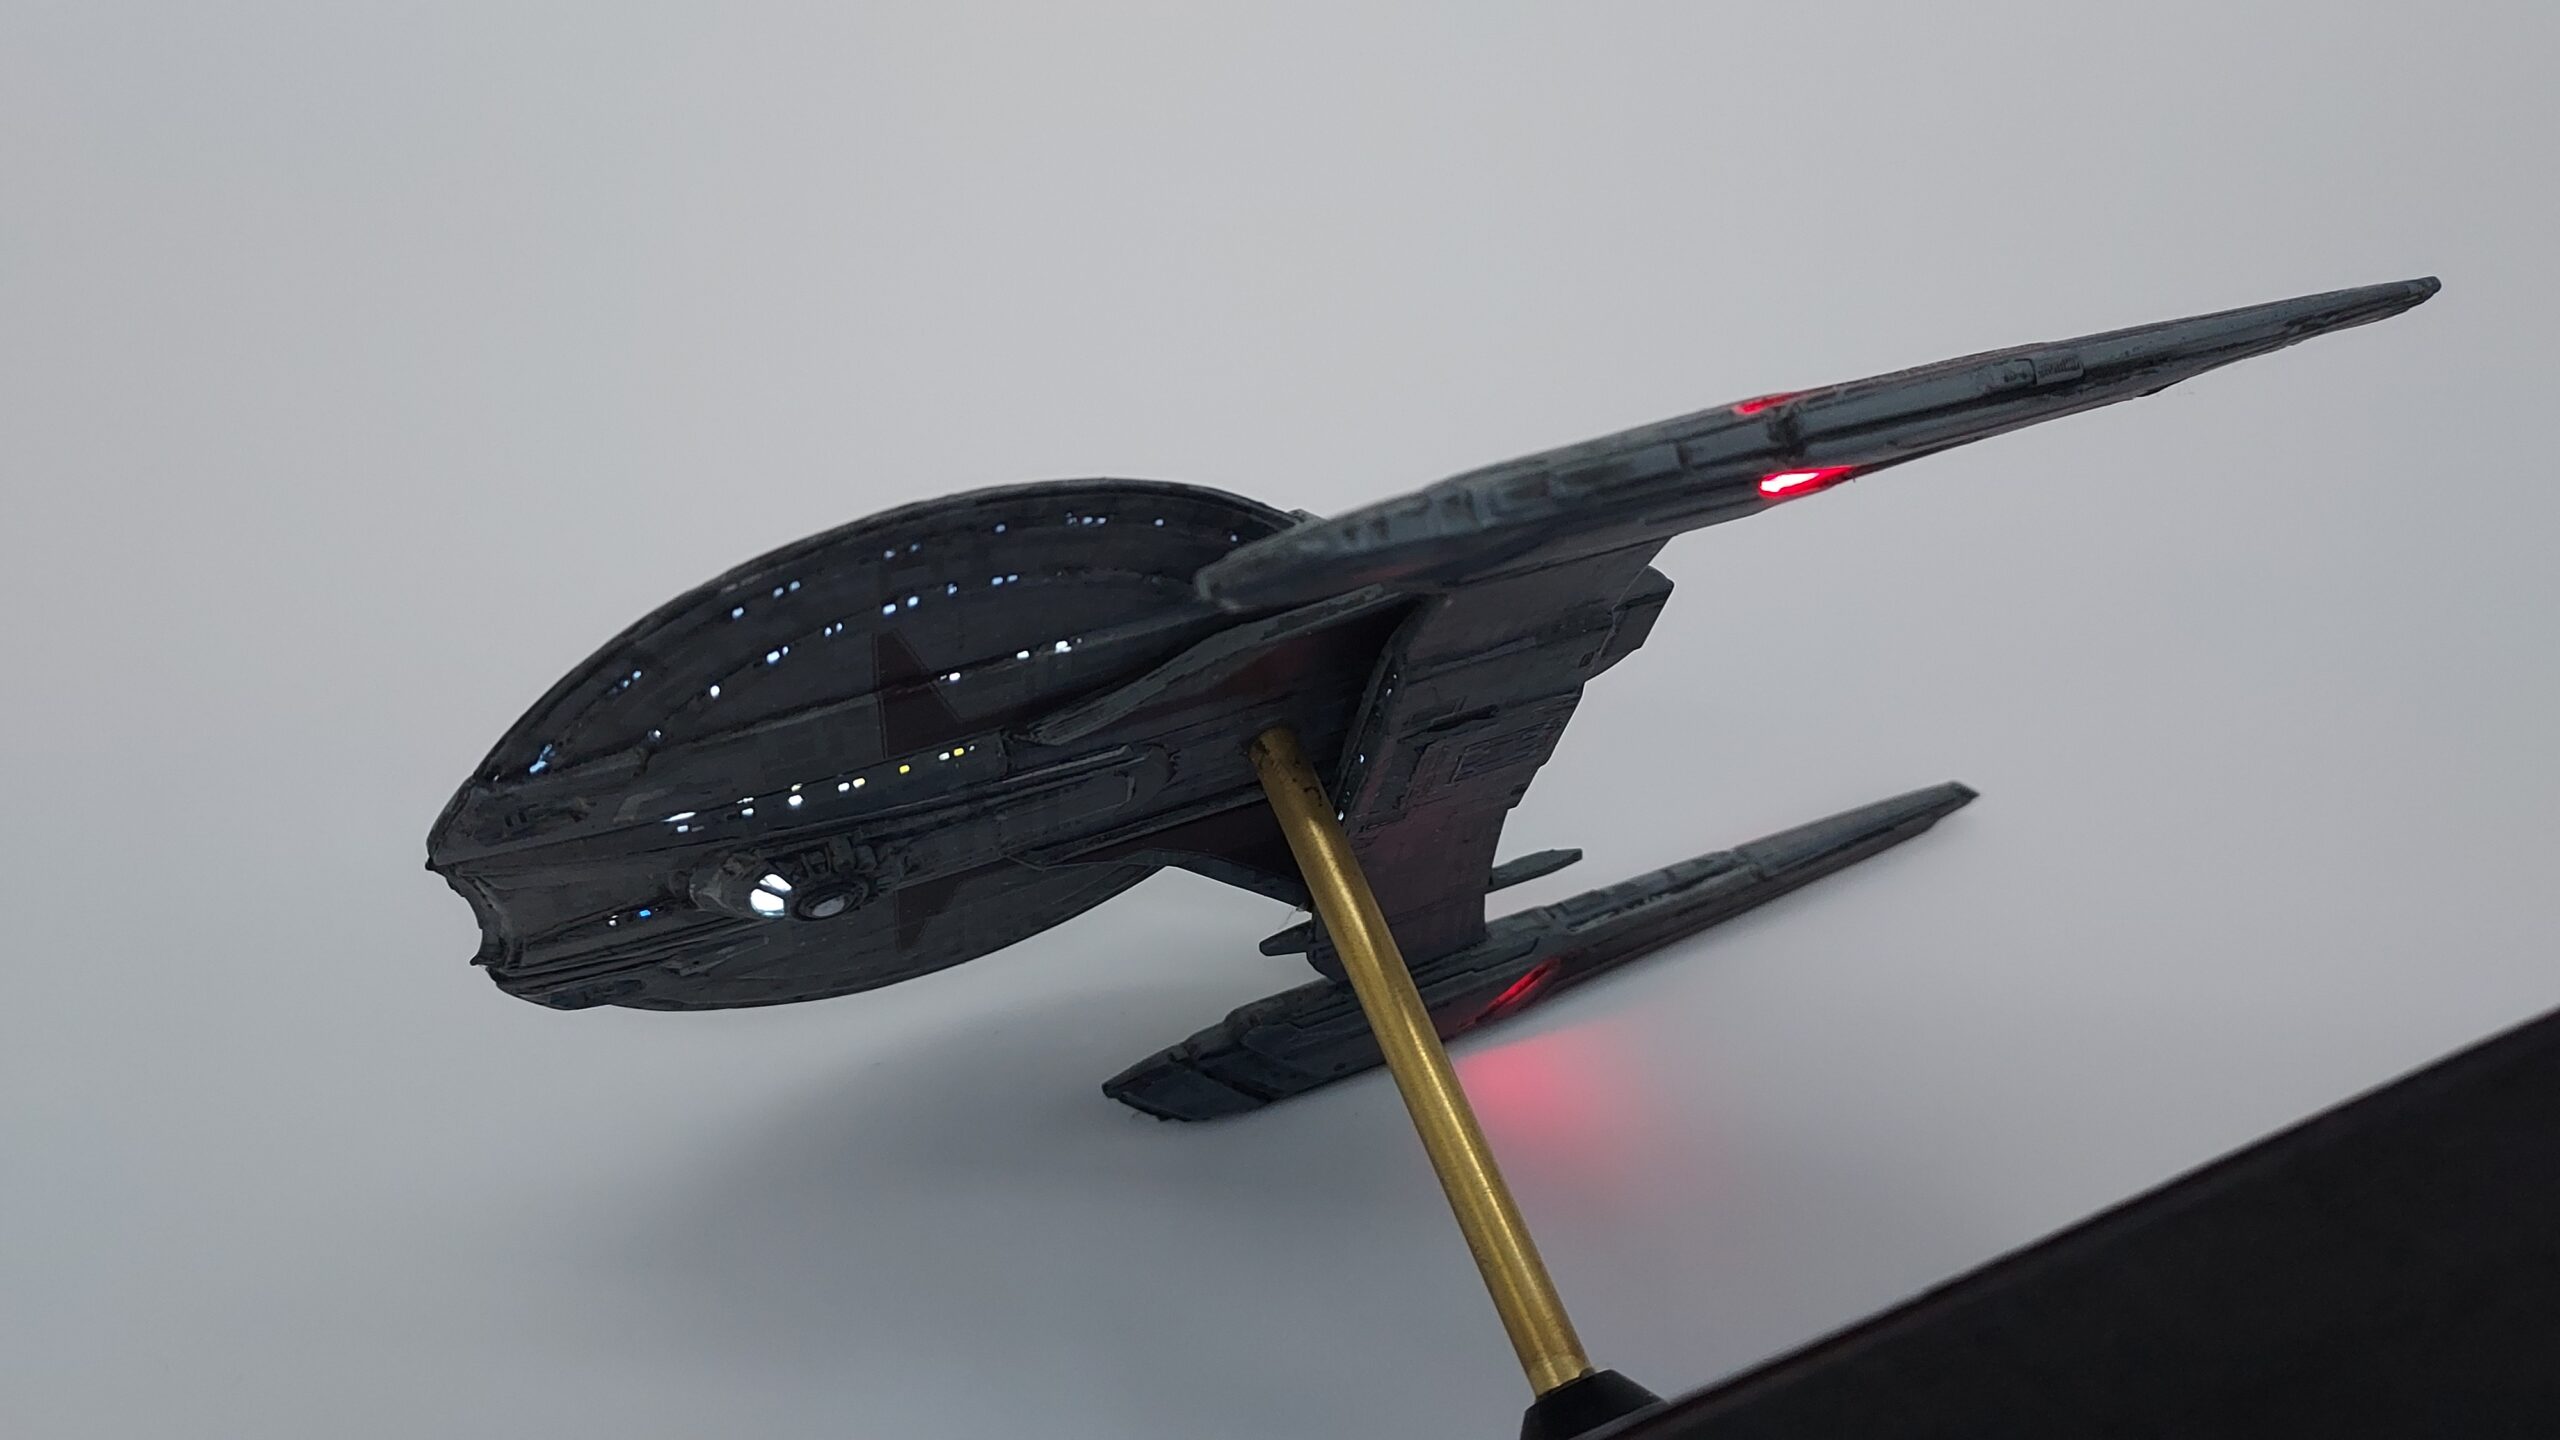
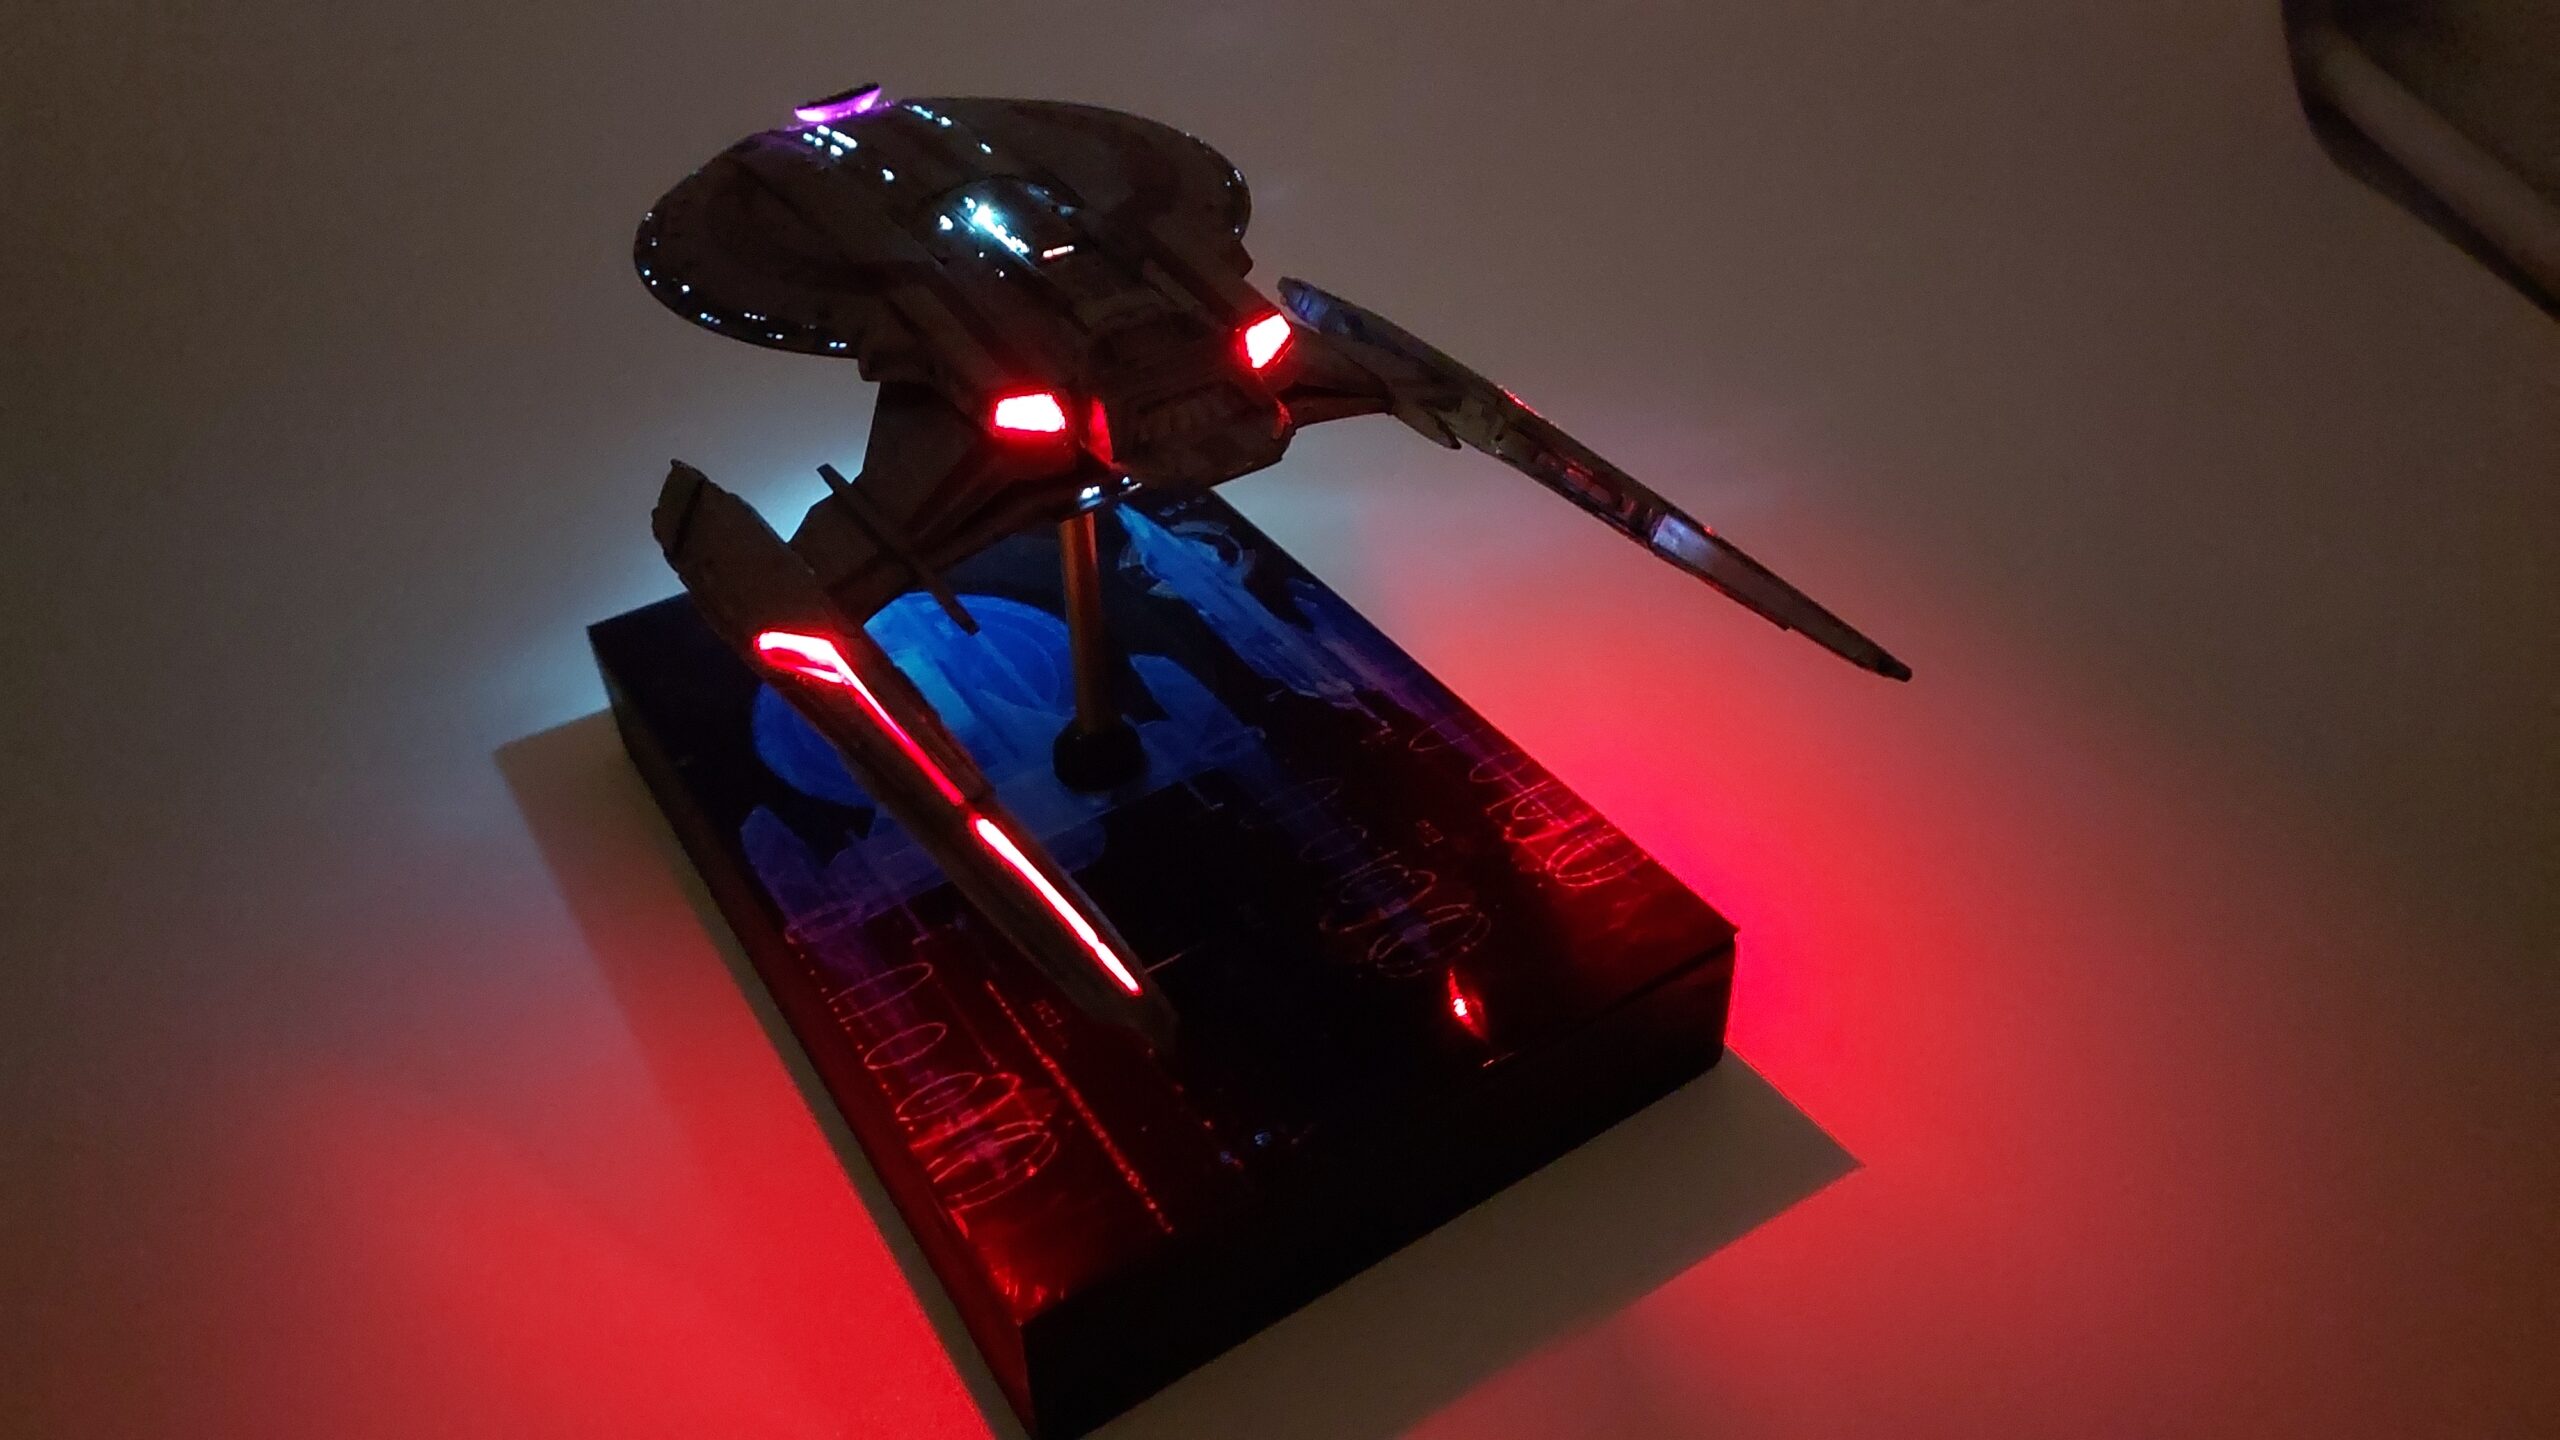
For my build, I knew that I wanted to try and add lighting to this cool kit, so before I started gluing or assembling anything, I worked out a basic idea for the lights. I ended up settling on 6 red SMDs, 2 small sections of a cool white LED strip, 2 violet SMDs, a 3mm cool white LED, and 4 cool white SMDs. I planned on focusing my efforts on lighting the nacelles, the impulse engines, the bridge, and the deflector dish. I ended up using a switchable 3.5-volt battery pack as the power supply and even though this kit is not super roomy on the interior, there was enough space to feed everything through the saucer and down a hollow brass rod into my custom base.
The interiors were first primed with black paint, to help lessen hotspots and then repainted with white, to help reflect the light around the interior spaces. That seemed to work well enough.
Before I closed each area on the ship, I made sure to add in the lights, run the wires into the next area, and test the connections multiple times. I was never 100% sure that my wires wouldn’t be cut by plastic parts pinching together, so I took as much care as I could and tested it all, repeatedly. I am still very surprised at just how many wires I was able to fit inside that saucer.
Wire pathing was the most complicated for the warp nacelles. To get those wires to the power source, they had to be routed across a section of solid plastic. To accomplish this, I ended up trenching two paths into the underside of the plastic supports, strung the wires down each of the trenches, and then covered the areas up with thin styrene sheet. The increase in the thickness of the supports was not noticeable and this method minimized sanding and filling. The wires were then routed into the secondary hull and then up through the existing attachment points, into the saucer. All of this had to happen, while not interfering with other lights or other wires. For someone who isn’t adept at electronics, I was pretty proud of my end product.
As it turned out, Kenny at Hobby Link International ended up sending me an upgrade set of photo etch parts from Greenstrawberry. That was a real game-changer! Because of that set, I was able to also add lighting to not only the saucer but also to the secondary hull. It took some additional customization of different areas around the ship, but it was well worth it. The PE added a ton of interest to the finished product. Without that lovely set, I wouldn’t have been able to accomplish this achievement, so thank you again, Kenny, for all your generosity!
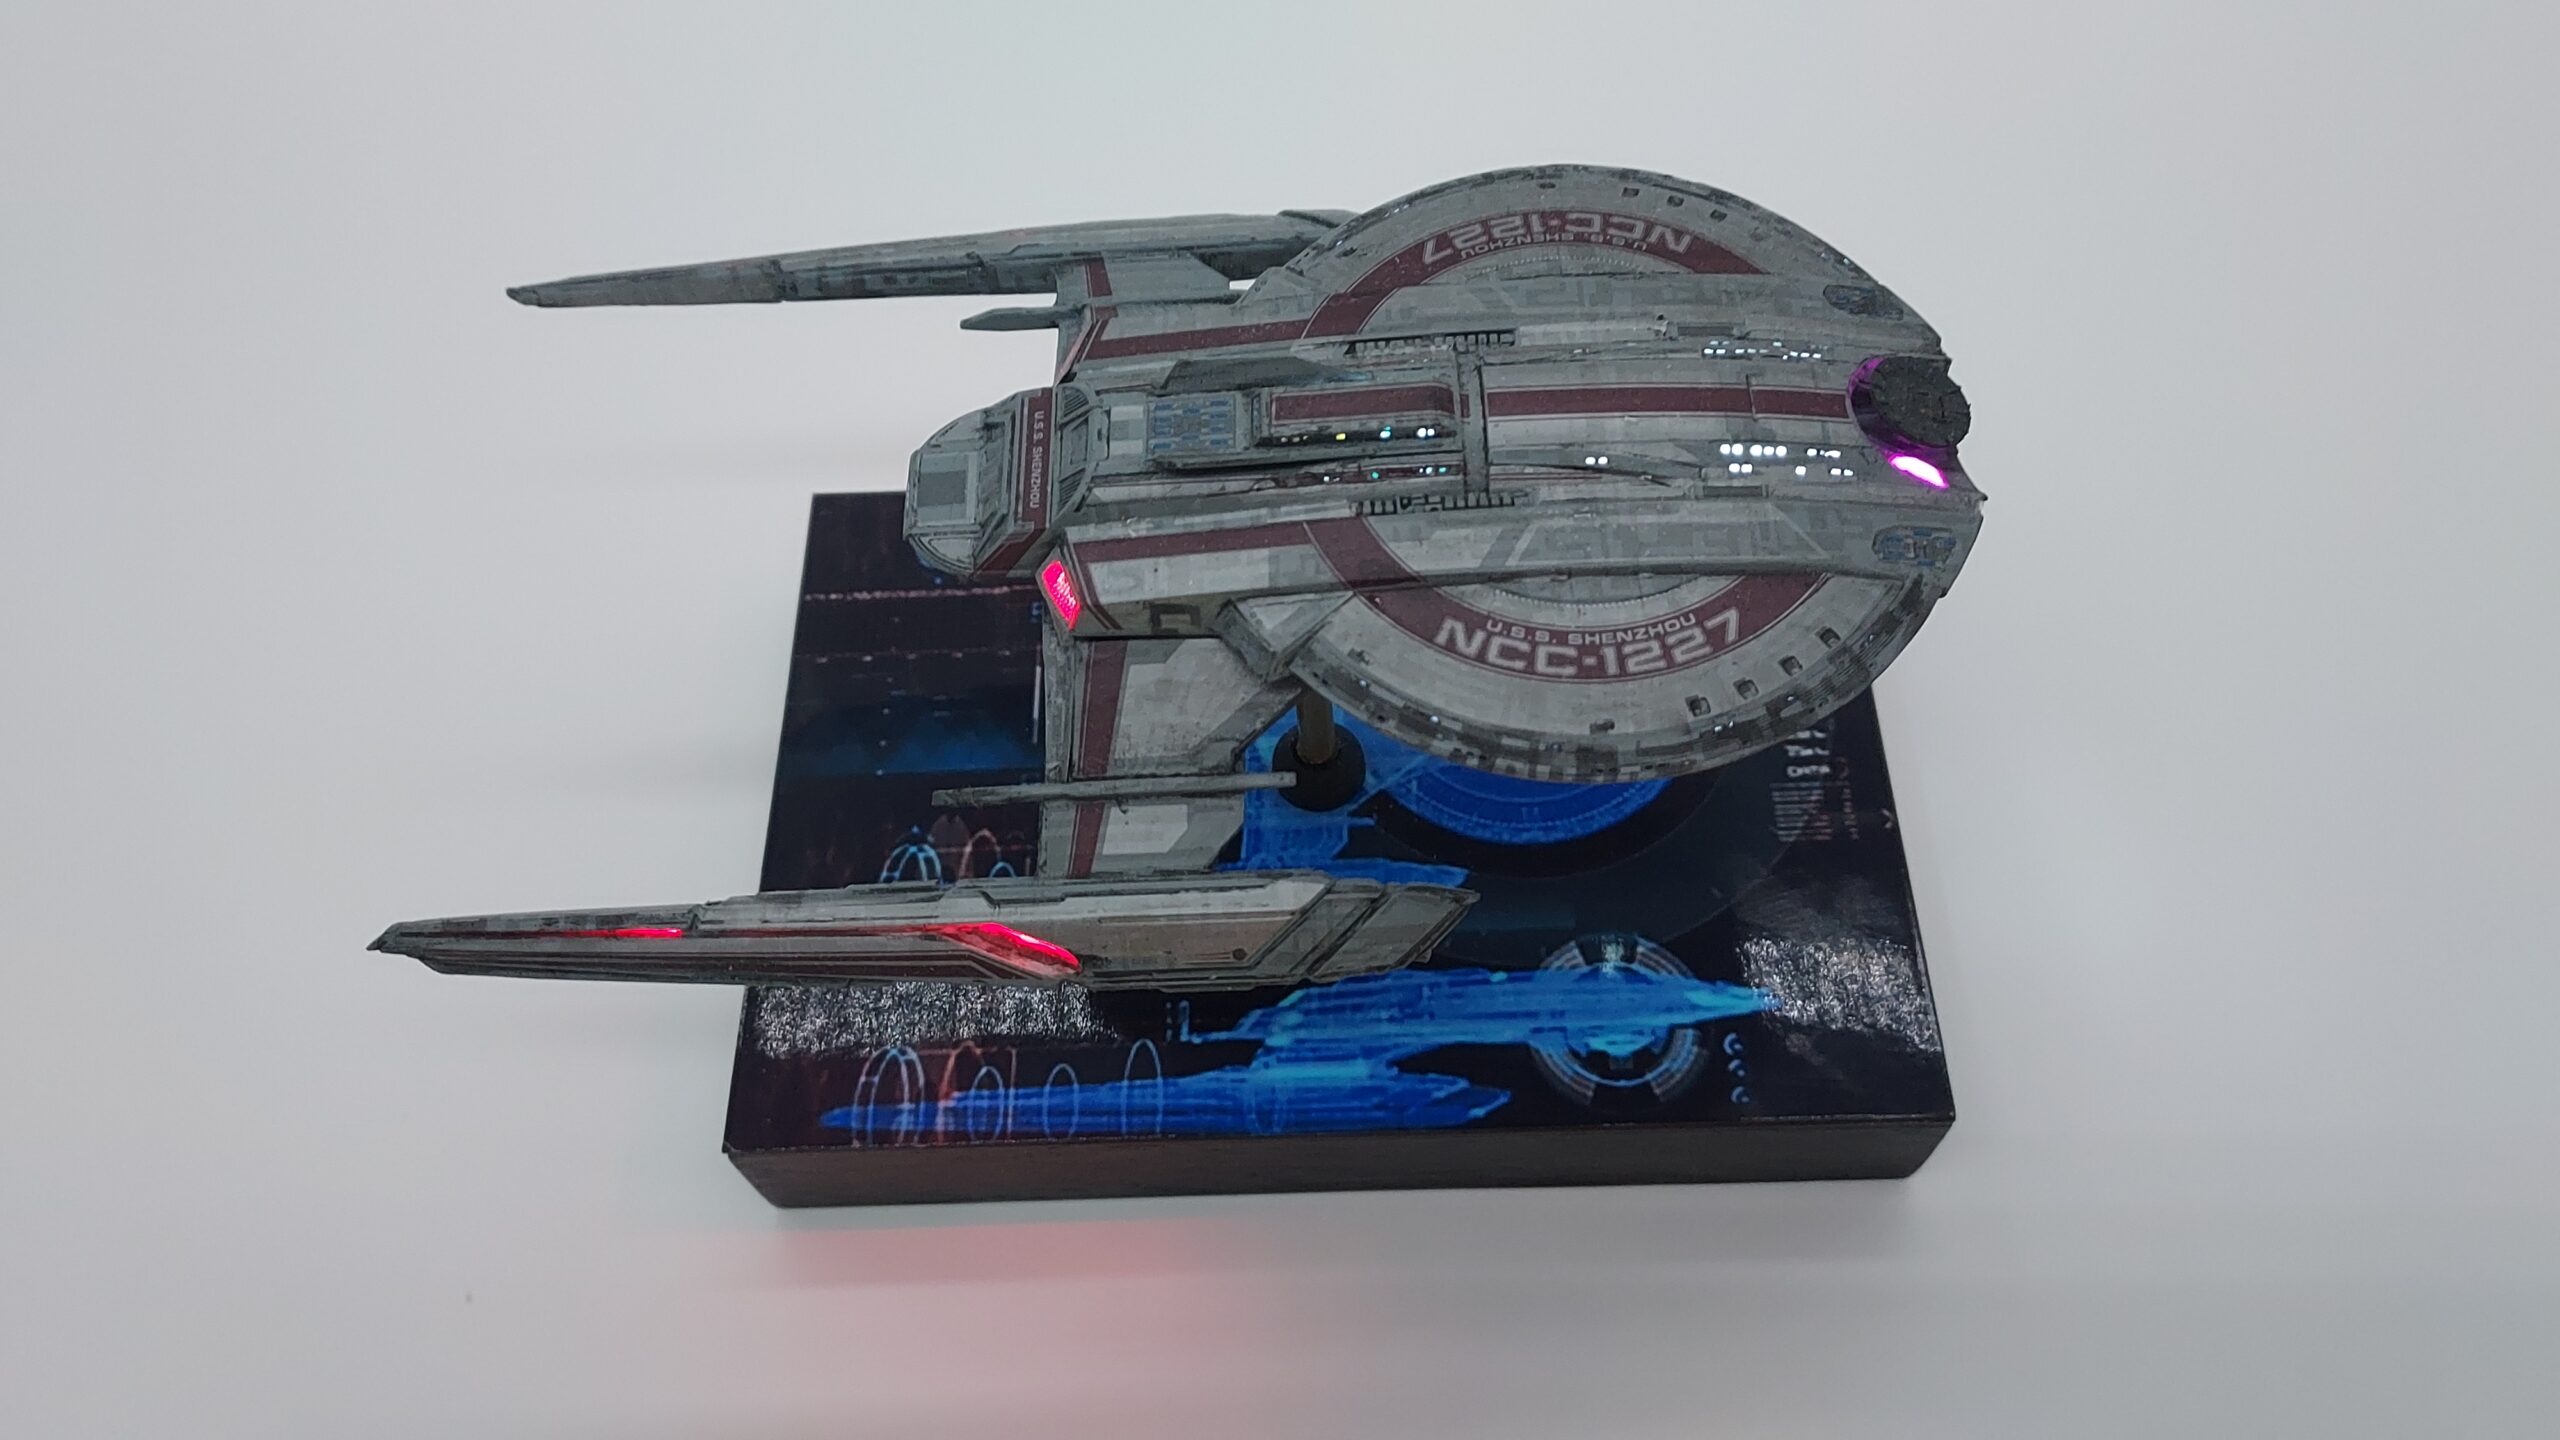
Once I was primed and ready for painting, I used a Tamiya neutral gray as my base color. I felt that that color would complement the look of the decals nicely and I was very pleased with the results. Honestly, the base color is open to interpretation, and I have seen all sorts of various colors used, from silver to metallic gray. Just use what you think looks good and have fun with it.
As I mentioned earlier, the decals were printed to represent fully lit windows. Since I had installed PE parts and LED lights into the ship, I had to alter some of those decals, to remove those windows. For that, I just took my X-acto knife and removed them where I could.
Since I had altered some of the decals, there were a few areas around the edge of the saucer and the tops of the nacelles that were a little plain-looking. To compensate for that, I used Extra Dark Sea Gray and some custom-cut masks to apply some bands of azteking. While not completely accurate, it looked fine to my eyes, so I went with it.
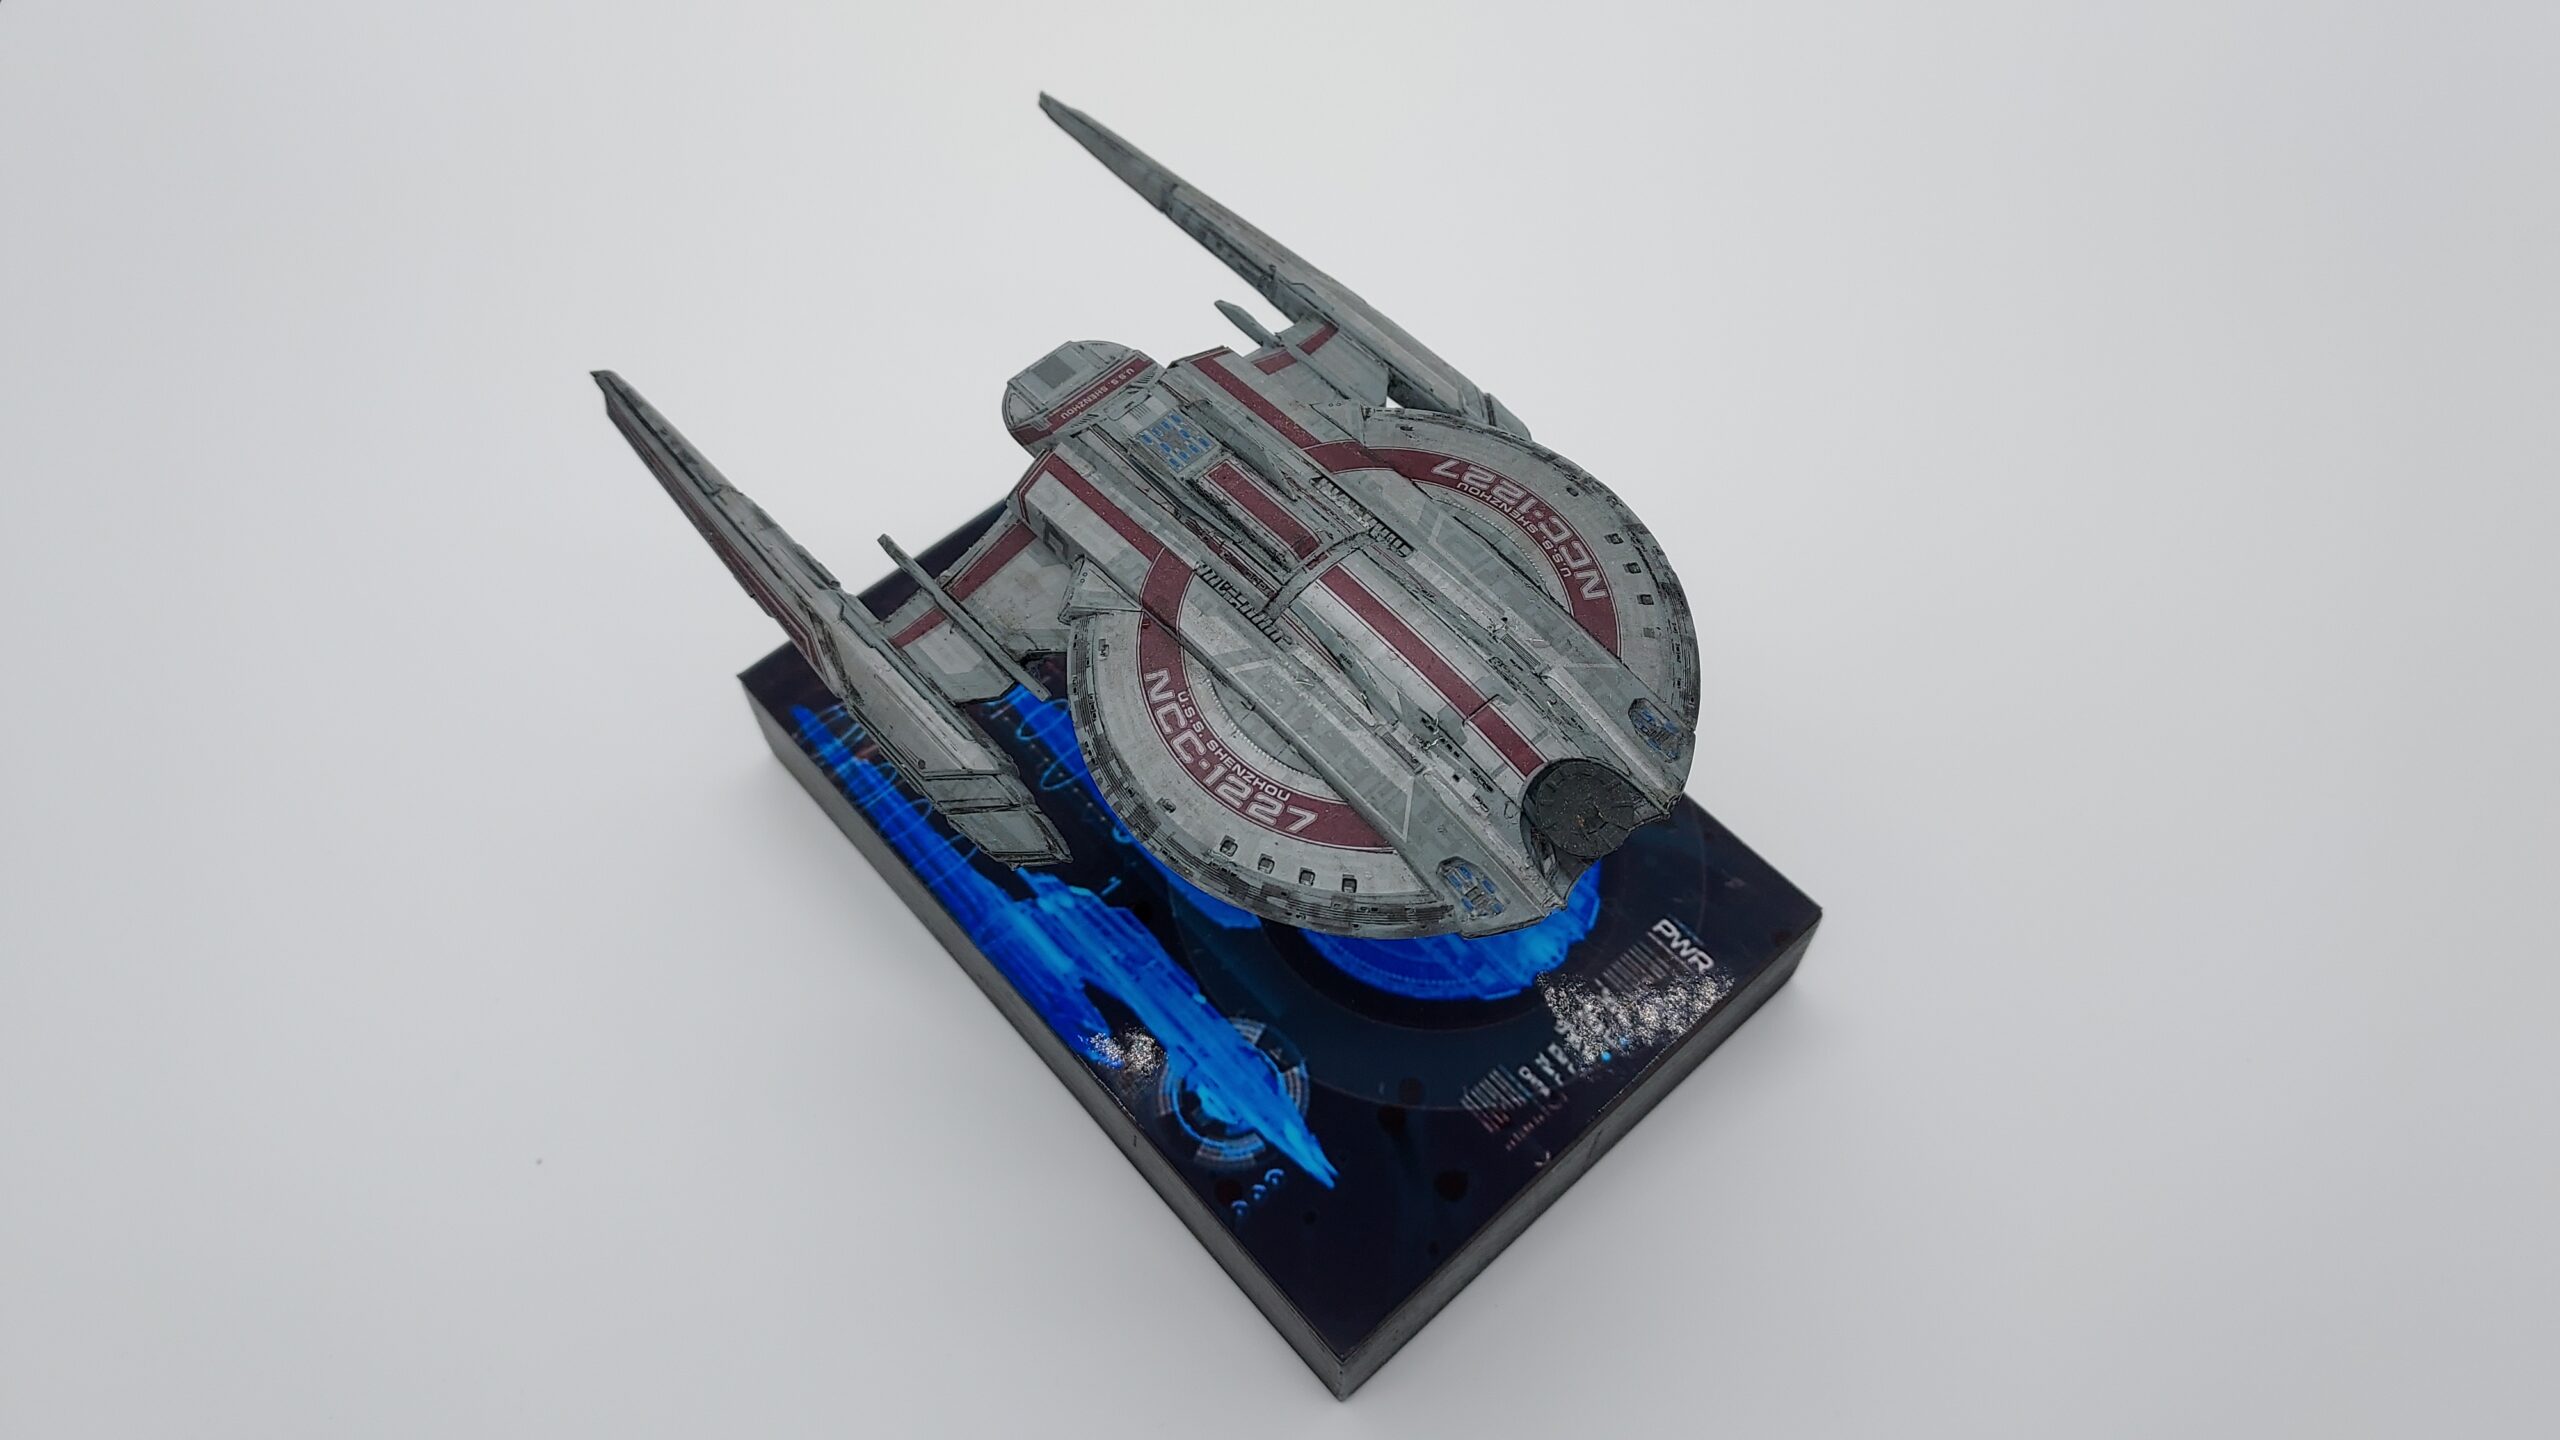
Everything was sealed up with a nice gloss coat and finished off with some weathering and a final semi-flat coat. I kept the weathering to a minimum, just settling on applying some panel liners from AK.
I kept the base simple. Since I was able to power all the LEDs with a single battery pack, the base didn’t have to be very big. It was just deep enough to allow for battery placement. I was also able to keep the edges clean by utilizing a battery pack with a built-in switch. Not as convenient to turn on and off, but it still works.
To try and bring a bit of color to the base, I found a schematic image of one of Shenzhou’s control panels and altered it with Photoshop. Once I was satisfied with the size and coloring of the image, I glued it down to a wooden shadow box that I had purchased from Michael’s. I then attached the brass rod and Shenzhou onto the base and that was when the Shenzhou was finished!
Conclusion
When I first started this project, a ton of questions popped into my mind. For example, could I fit that many LEDs into such a small model? Could I wire everything together and make it work? Would the LEDs be bright enough to illuminate the interior spaces? How would I open so many, tiny little windows? It was a daunting task, but once I got into it, I had so much fun learning and experiencing the many facets of this build. Sure, I was skeptical at first, but boy am I glad I gave it a try.
Overall, this was a great project and a really fun kit to work on. The construction was simple and straightforward, no drama whatsoever. The design of the kit allowed for some cleaver customization and plastic removal, while not hampering the kit’s overall structural stability. It was spacious enough to allow for the fitting of multiple small LEDs and with some clever routing, I am sure that a more talented modeler could do far more with this kit than I was able to accomplish. It is a great platform for customization, and I say well done Polar Lights! Now, let’s hope that they release a 1/1000 scale version of this sweet-looking ship.
Also, I wanted to give a huge shout-out and thank you to Kenny and to the HLI community, for all of the support and inspiration. Since LEDs are still a bit of a mystery to me, I wasn’t sure if I could pull this project off, but everyone was so supportive, it gave me the will to stick it out and make something that I am proud of. Is it perfect? Absolutely not, but boy did I have fun working on it.
Feel free to check out my completed U.S.S. Shenzhou playlist over on my YouTube channel! And until the next build, thanks for joining me today, stay safe, and happy modeling.
Ben
U.S.S. Shenzhou YouTube Playlist
https://www.youtube.com/playlist?list=PLdtW56QfQrXhm8SpbhxM73DSopP-u5_IY