

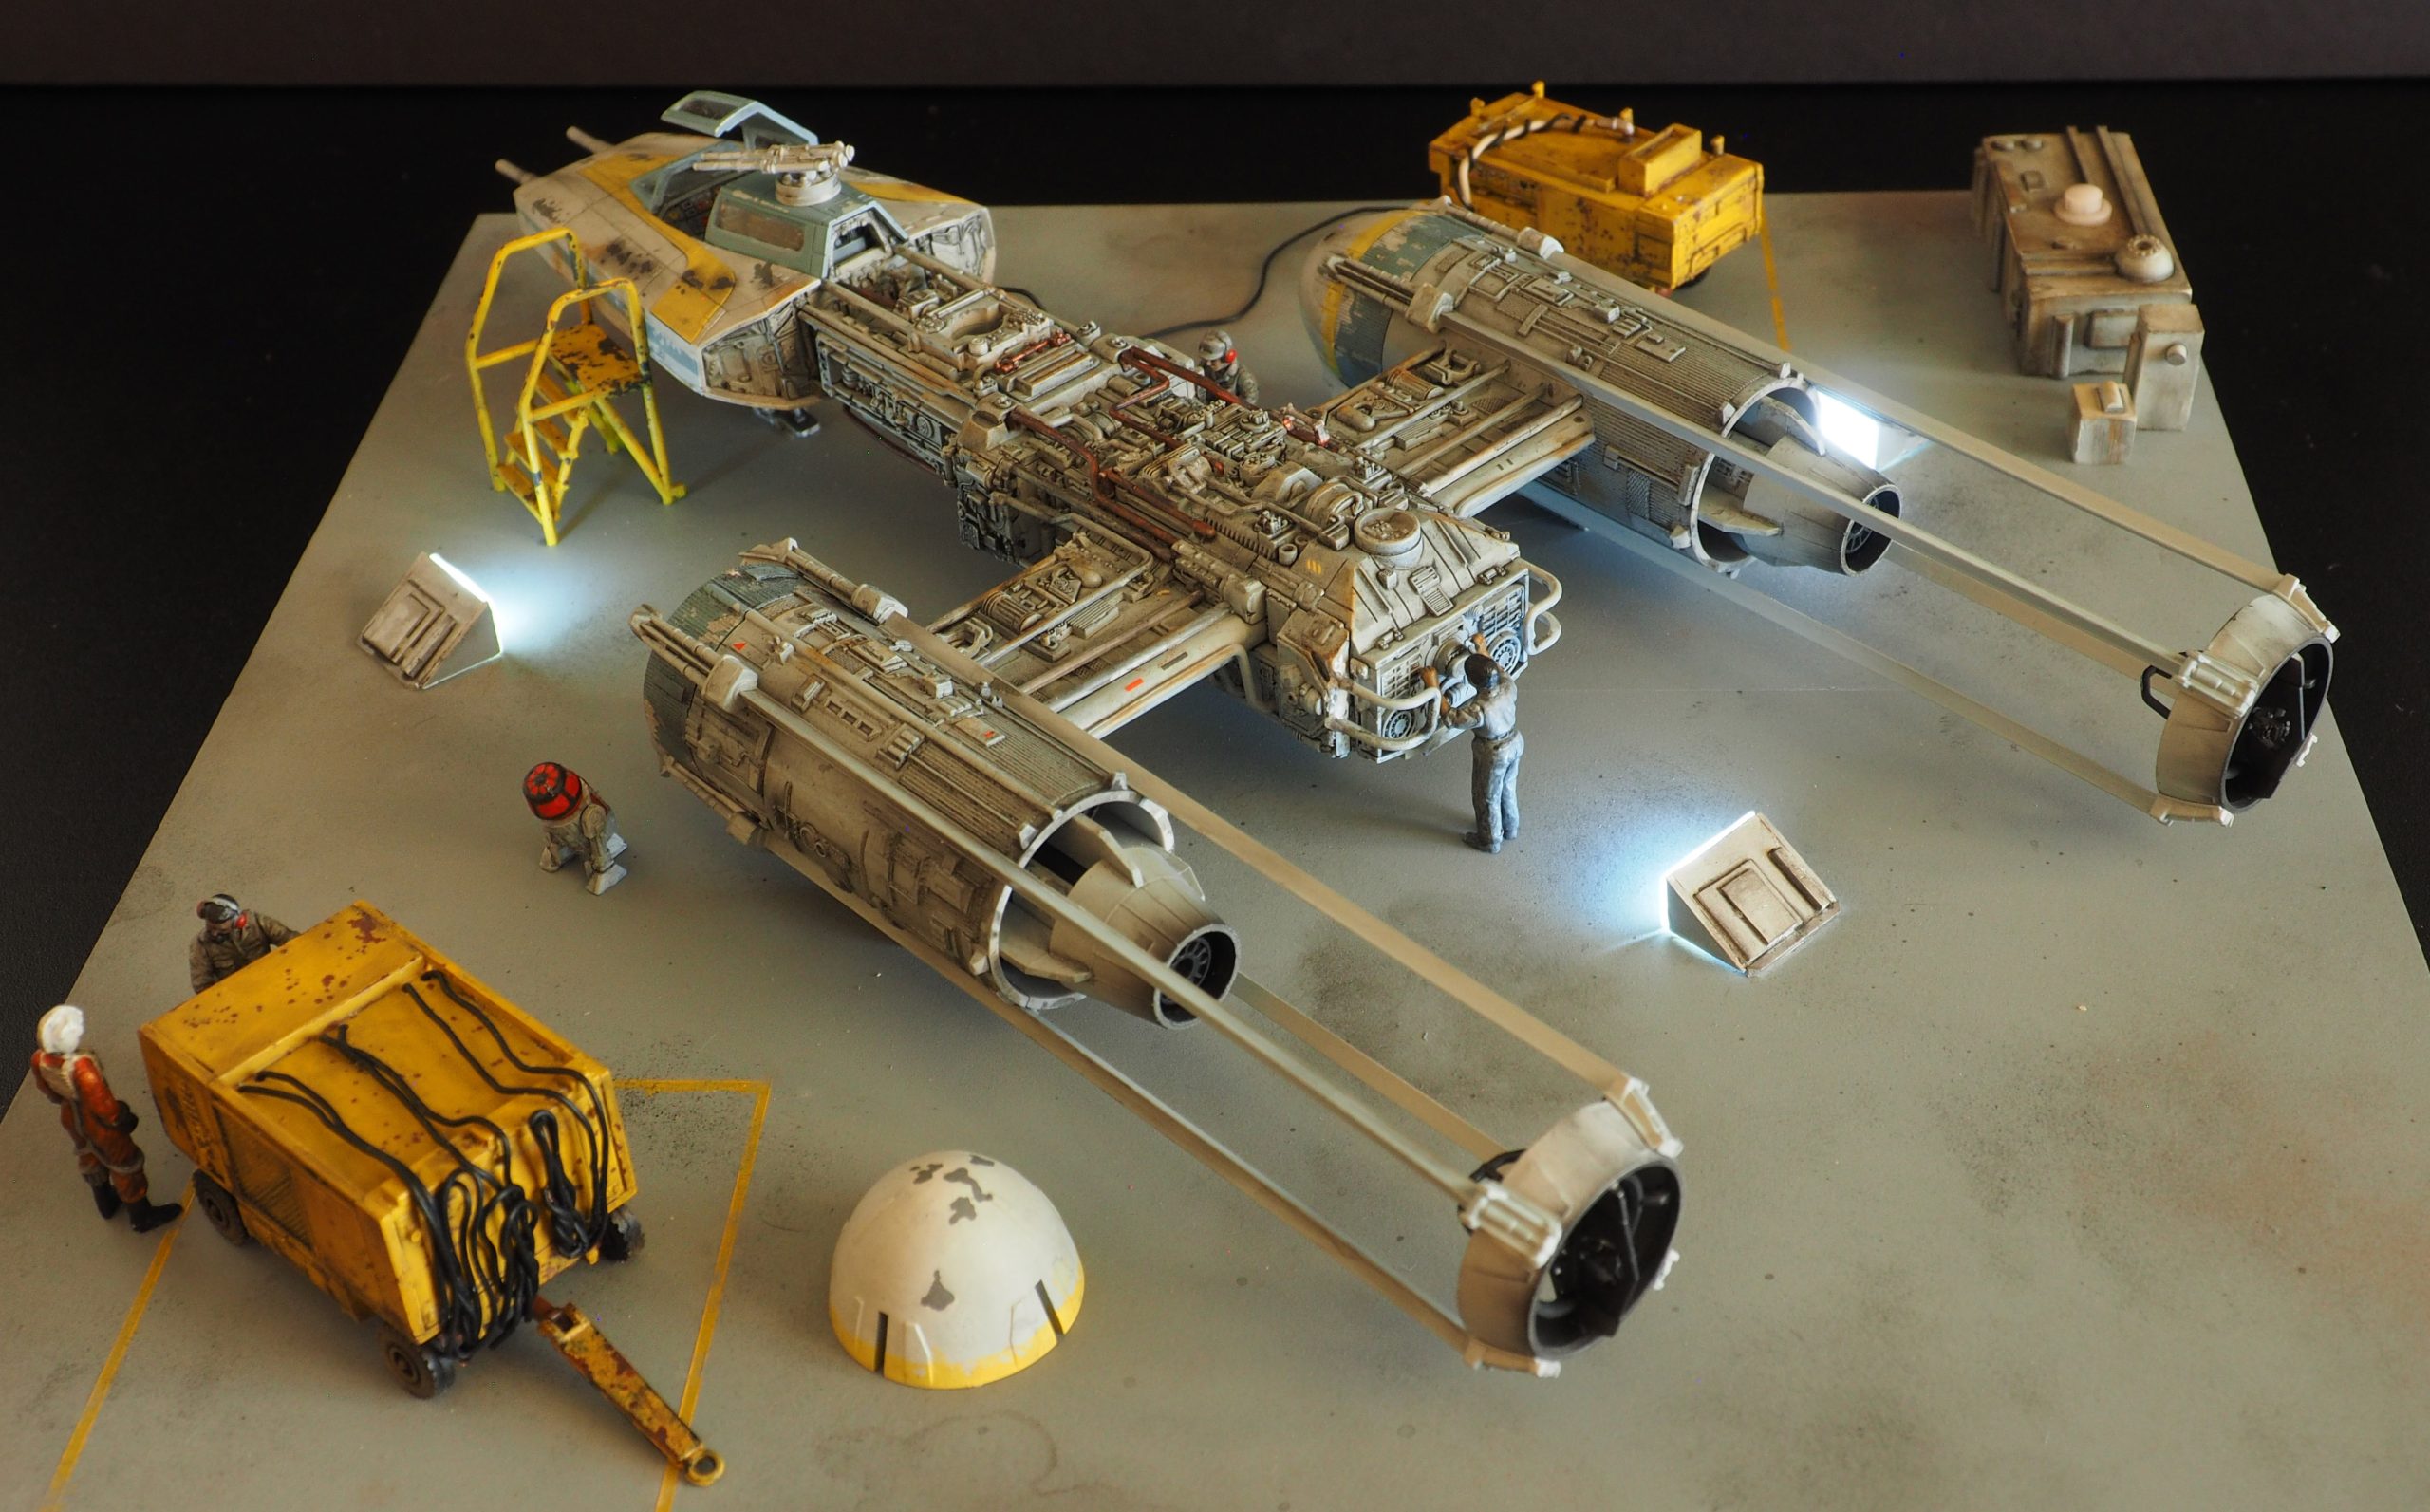
One of my favorite ships from Star Wars has always been the Y-Wing and I finally decided to build one. I had heard so many good things about Bandai and I thought it was time to try out one of their kits. What a great way to start.
The kit
This Bandai model is a 1/72 scale representation of the ship. As you know the ship itself is highly detailed and Bandai gives the modeler “the Y-Wing we were looking for.” You’ll find the workmanship and quality of the kit to be top-notch.
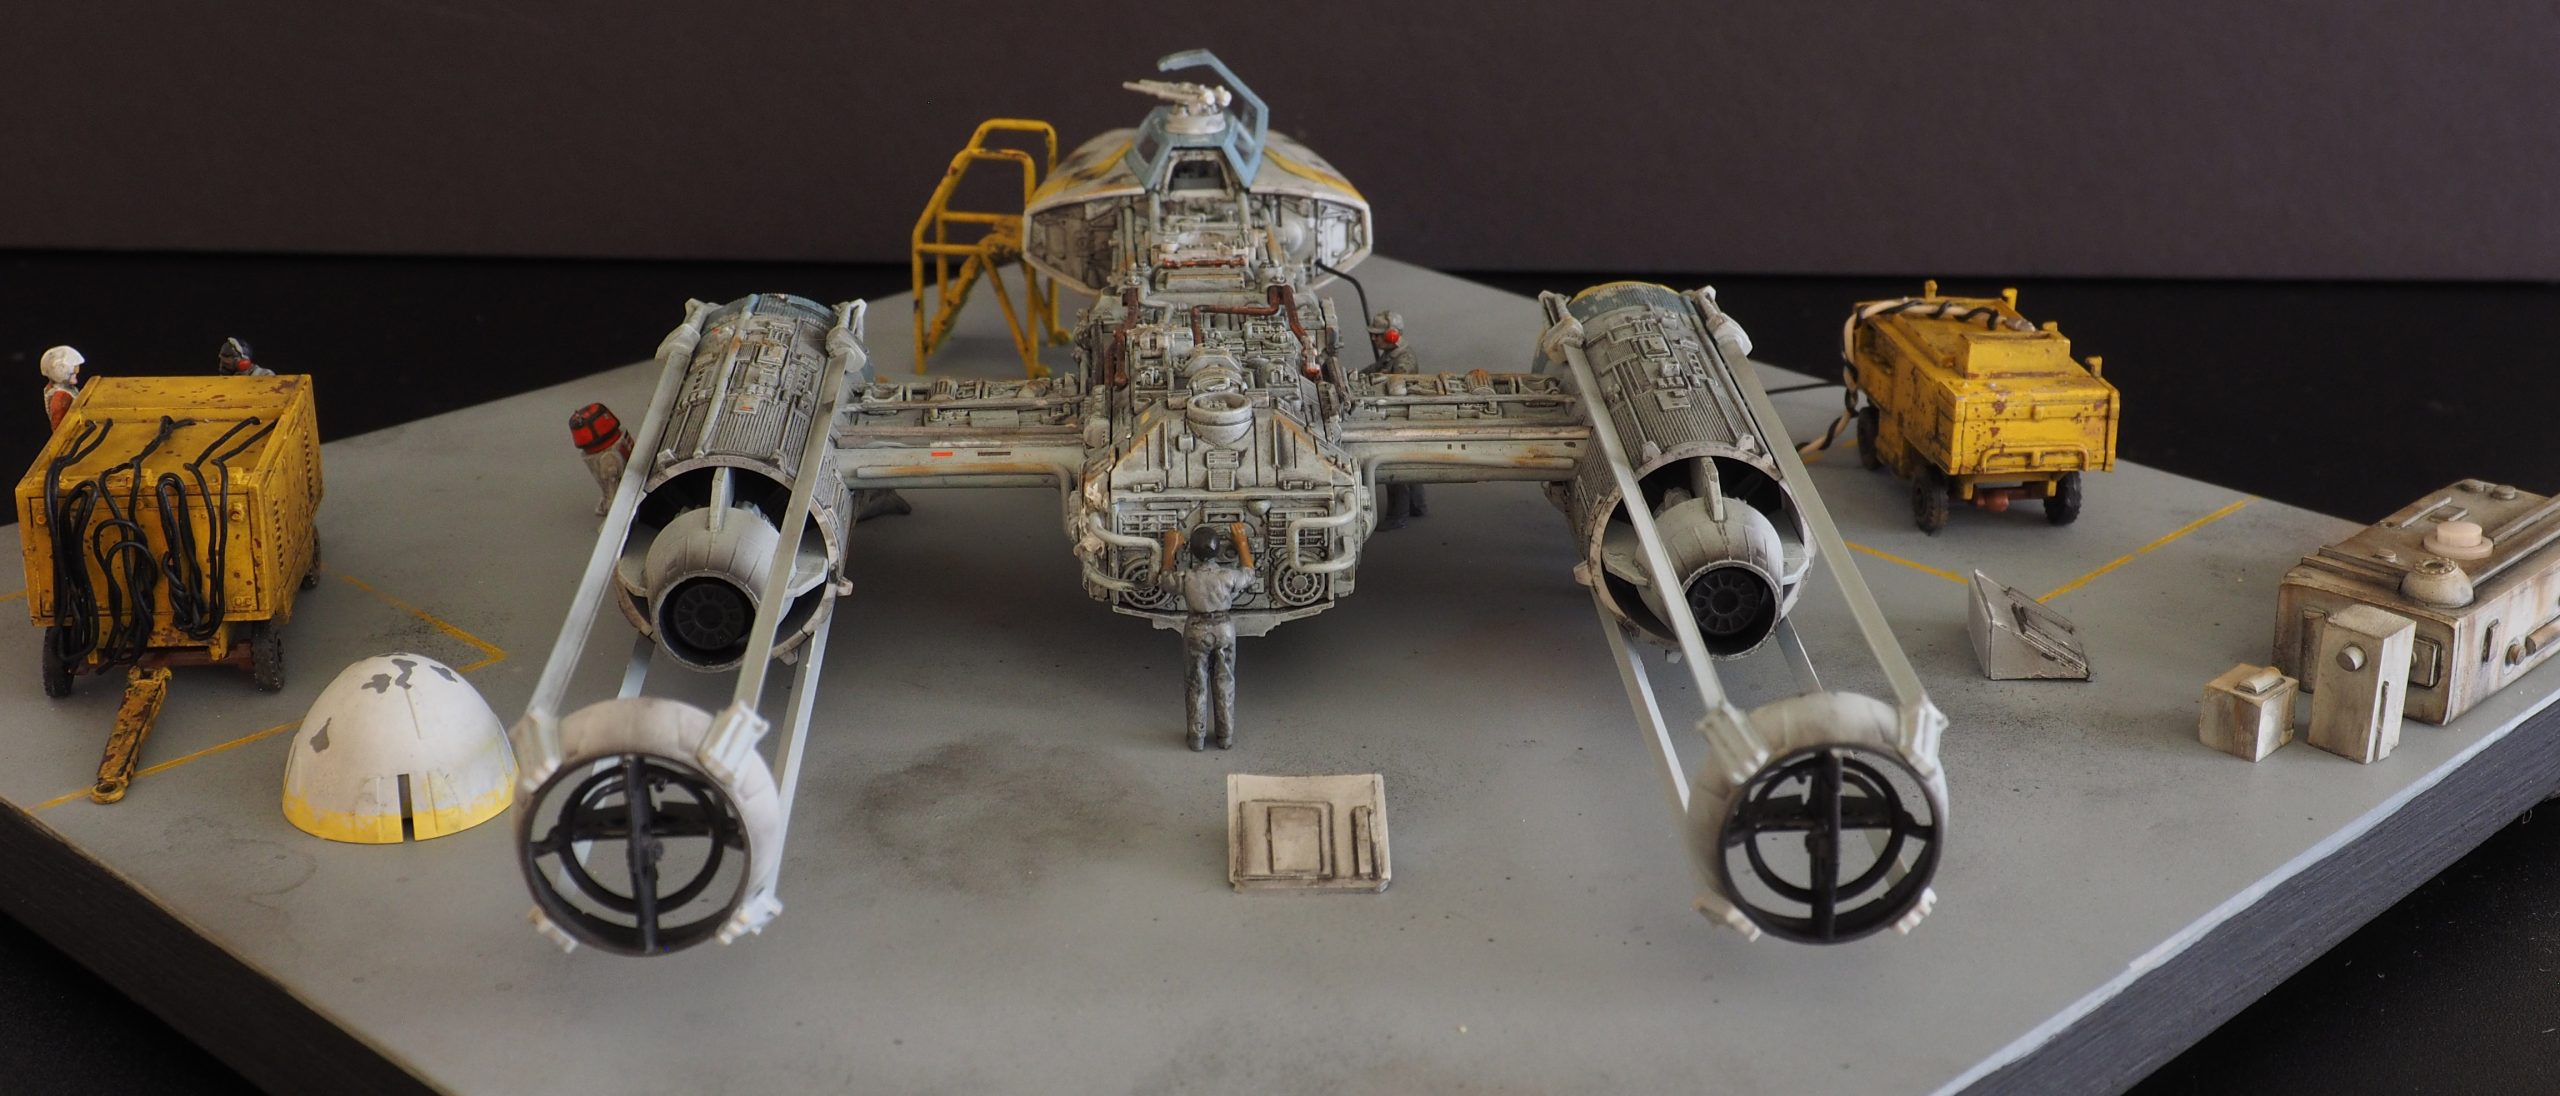
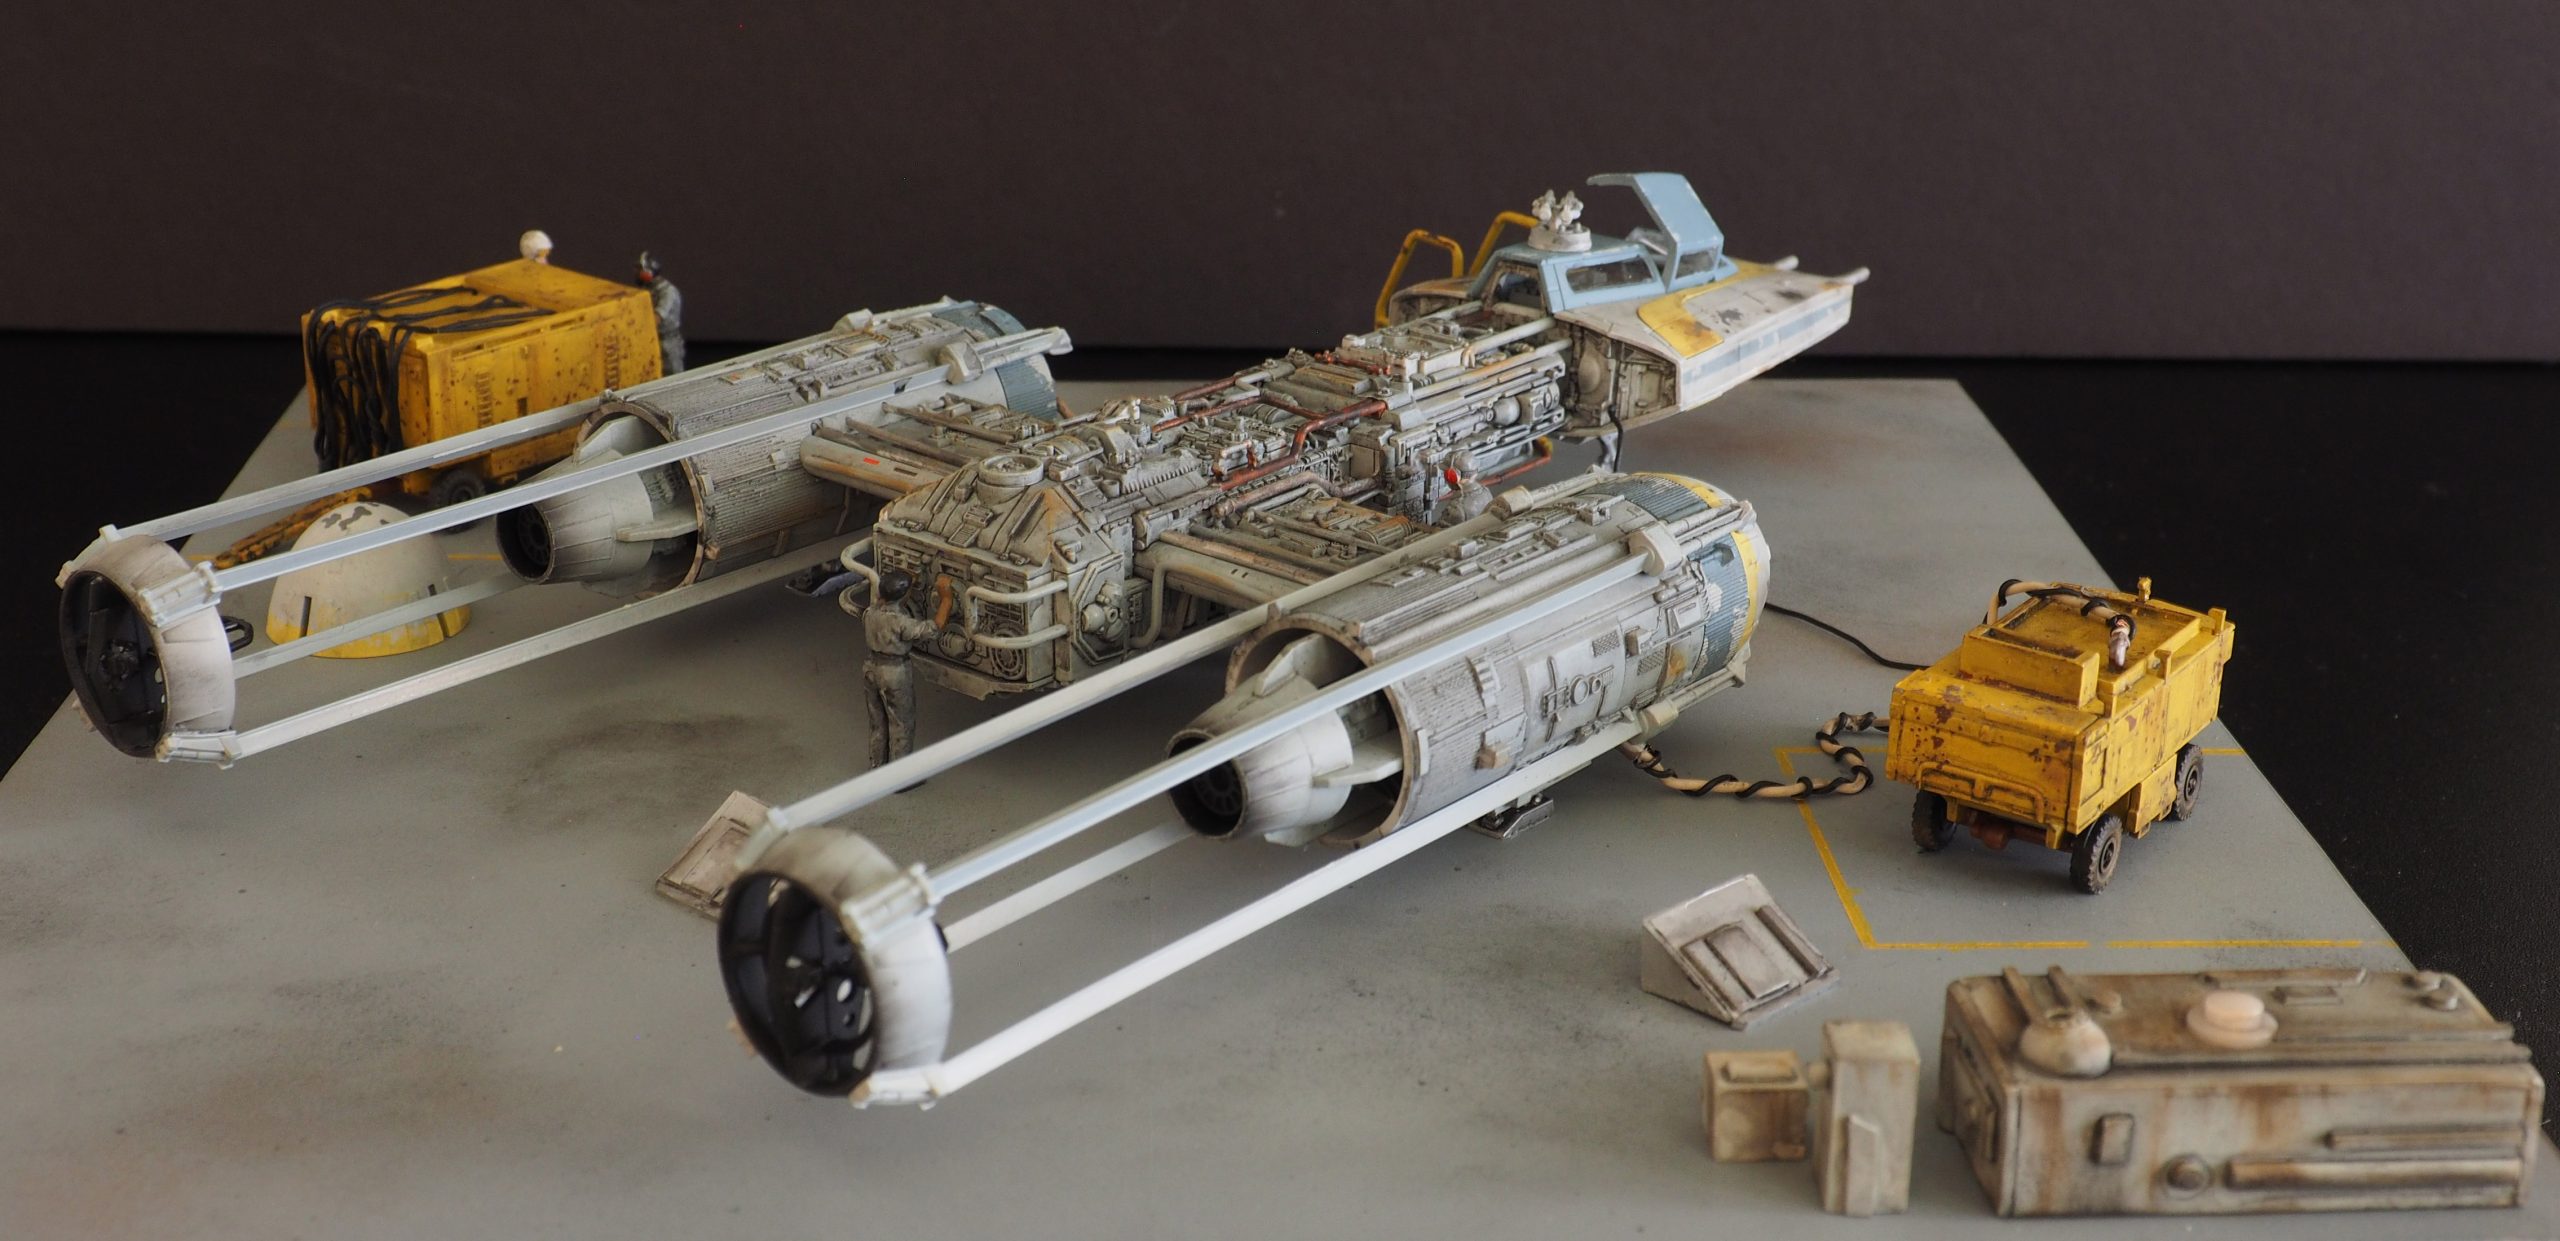
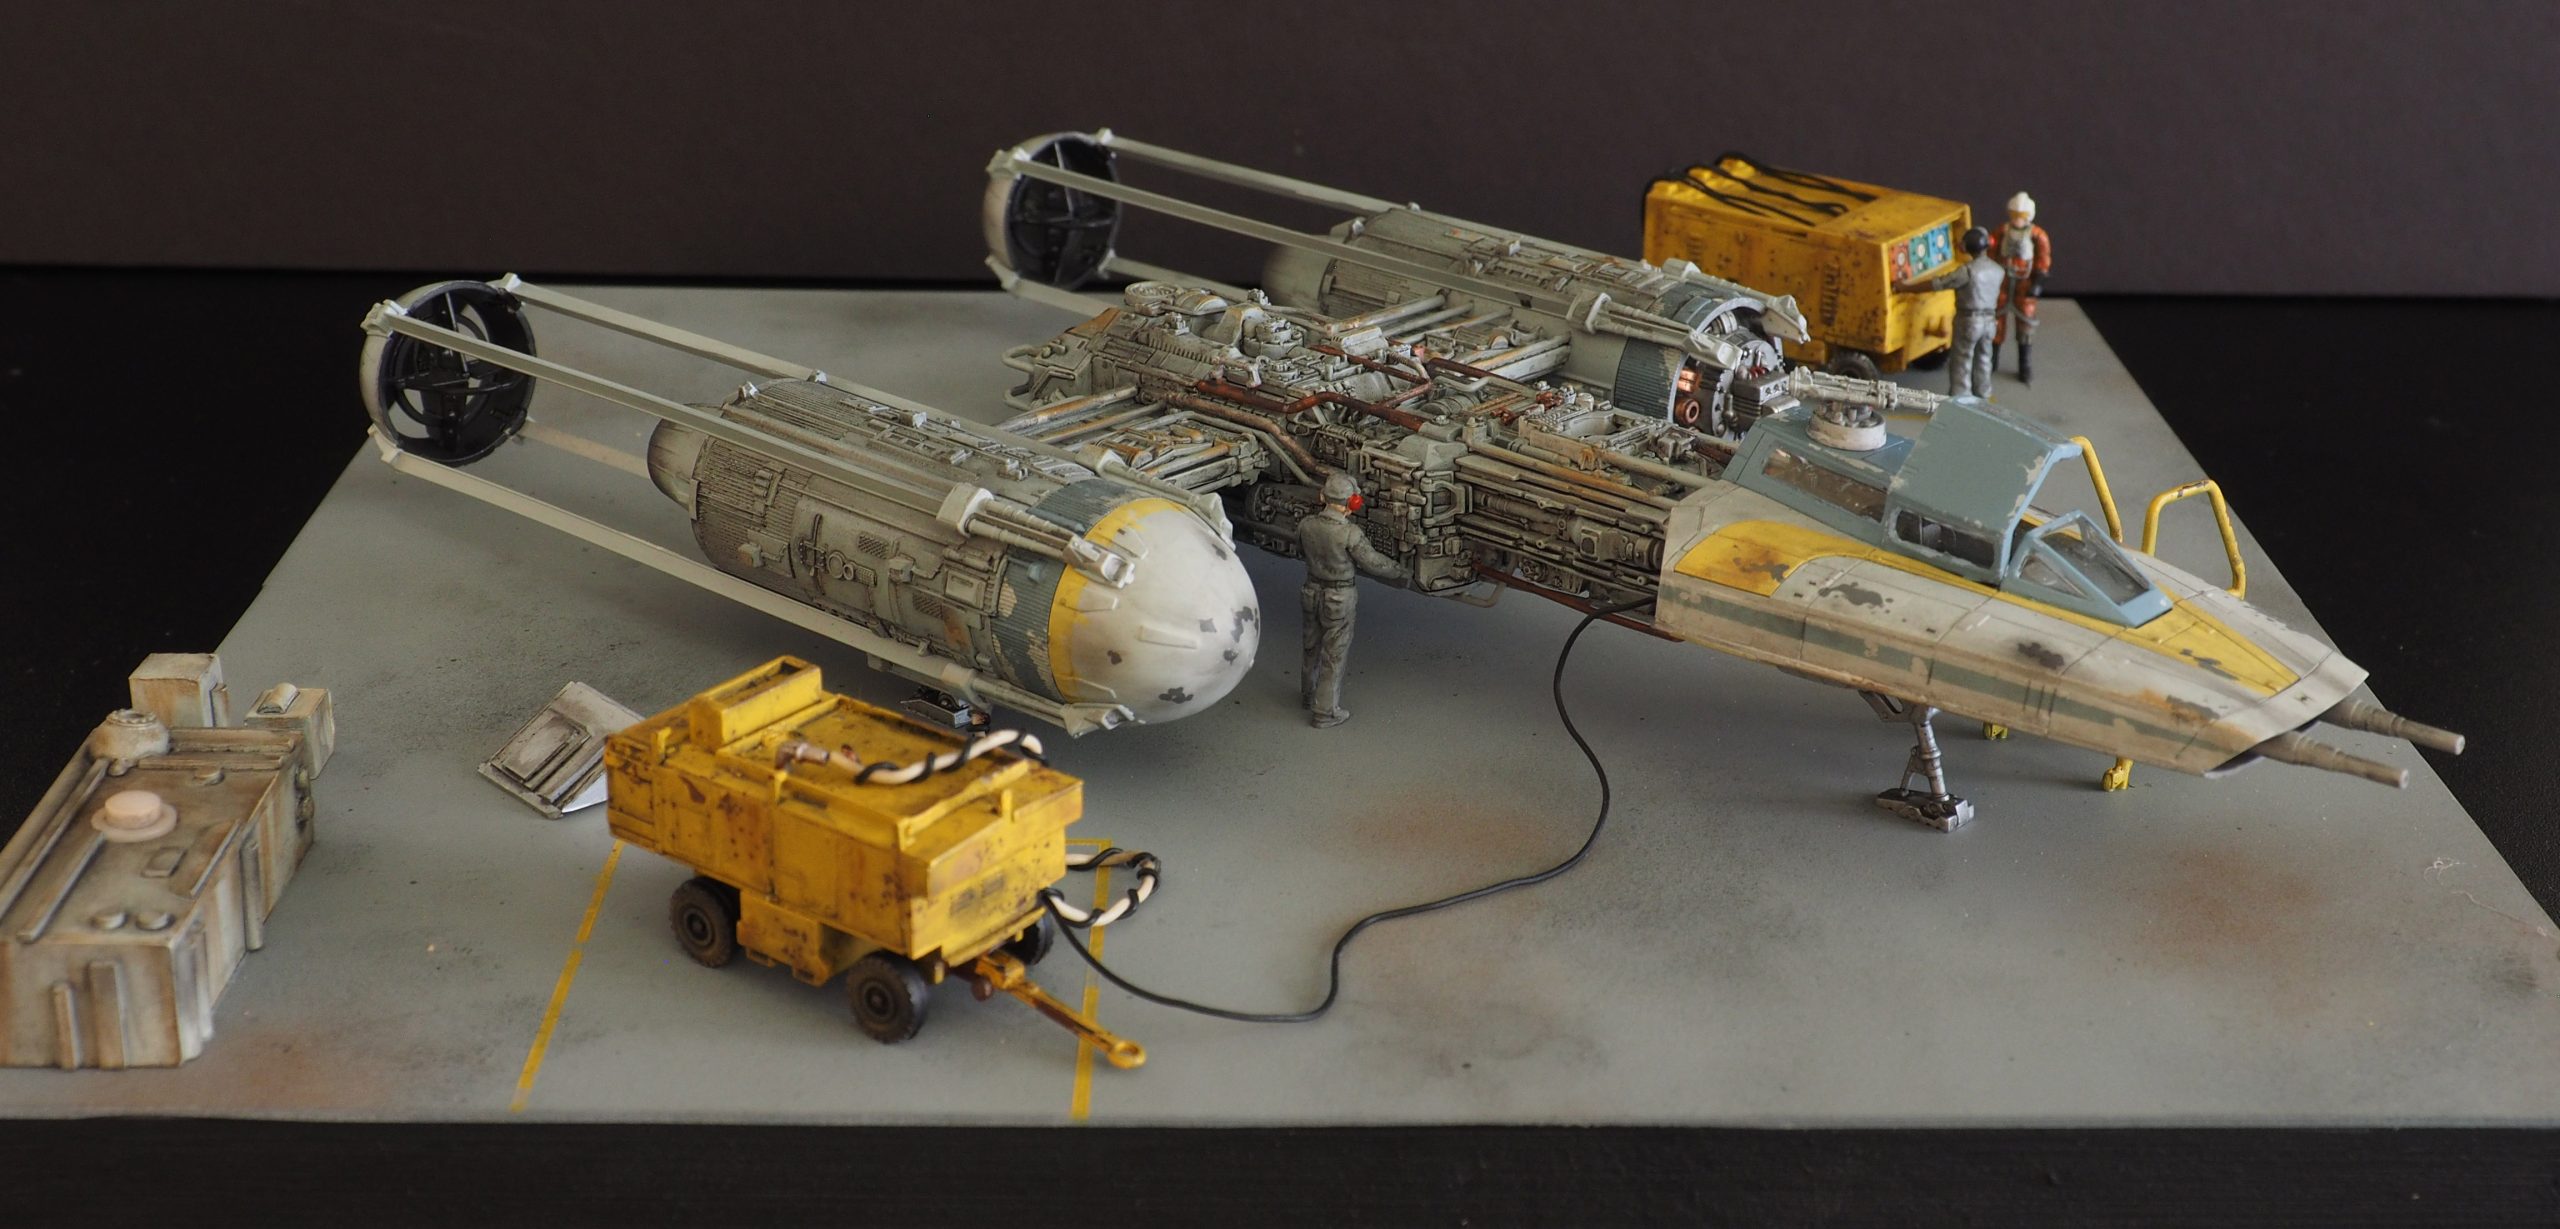
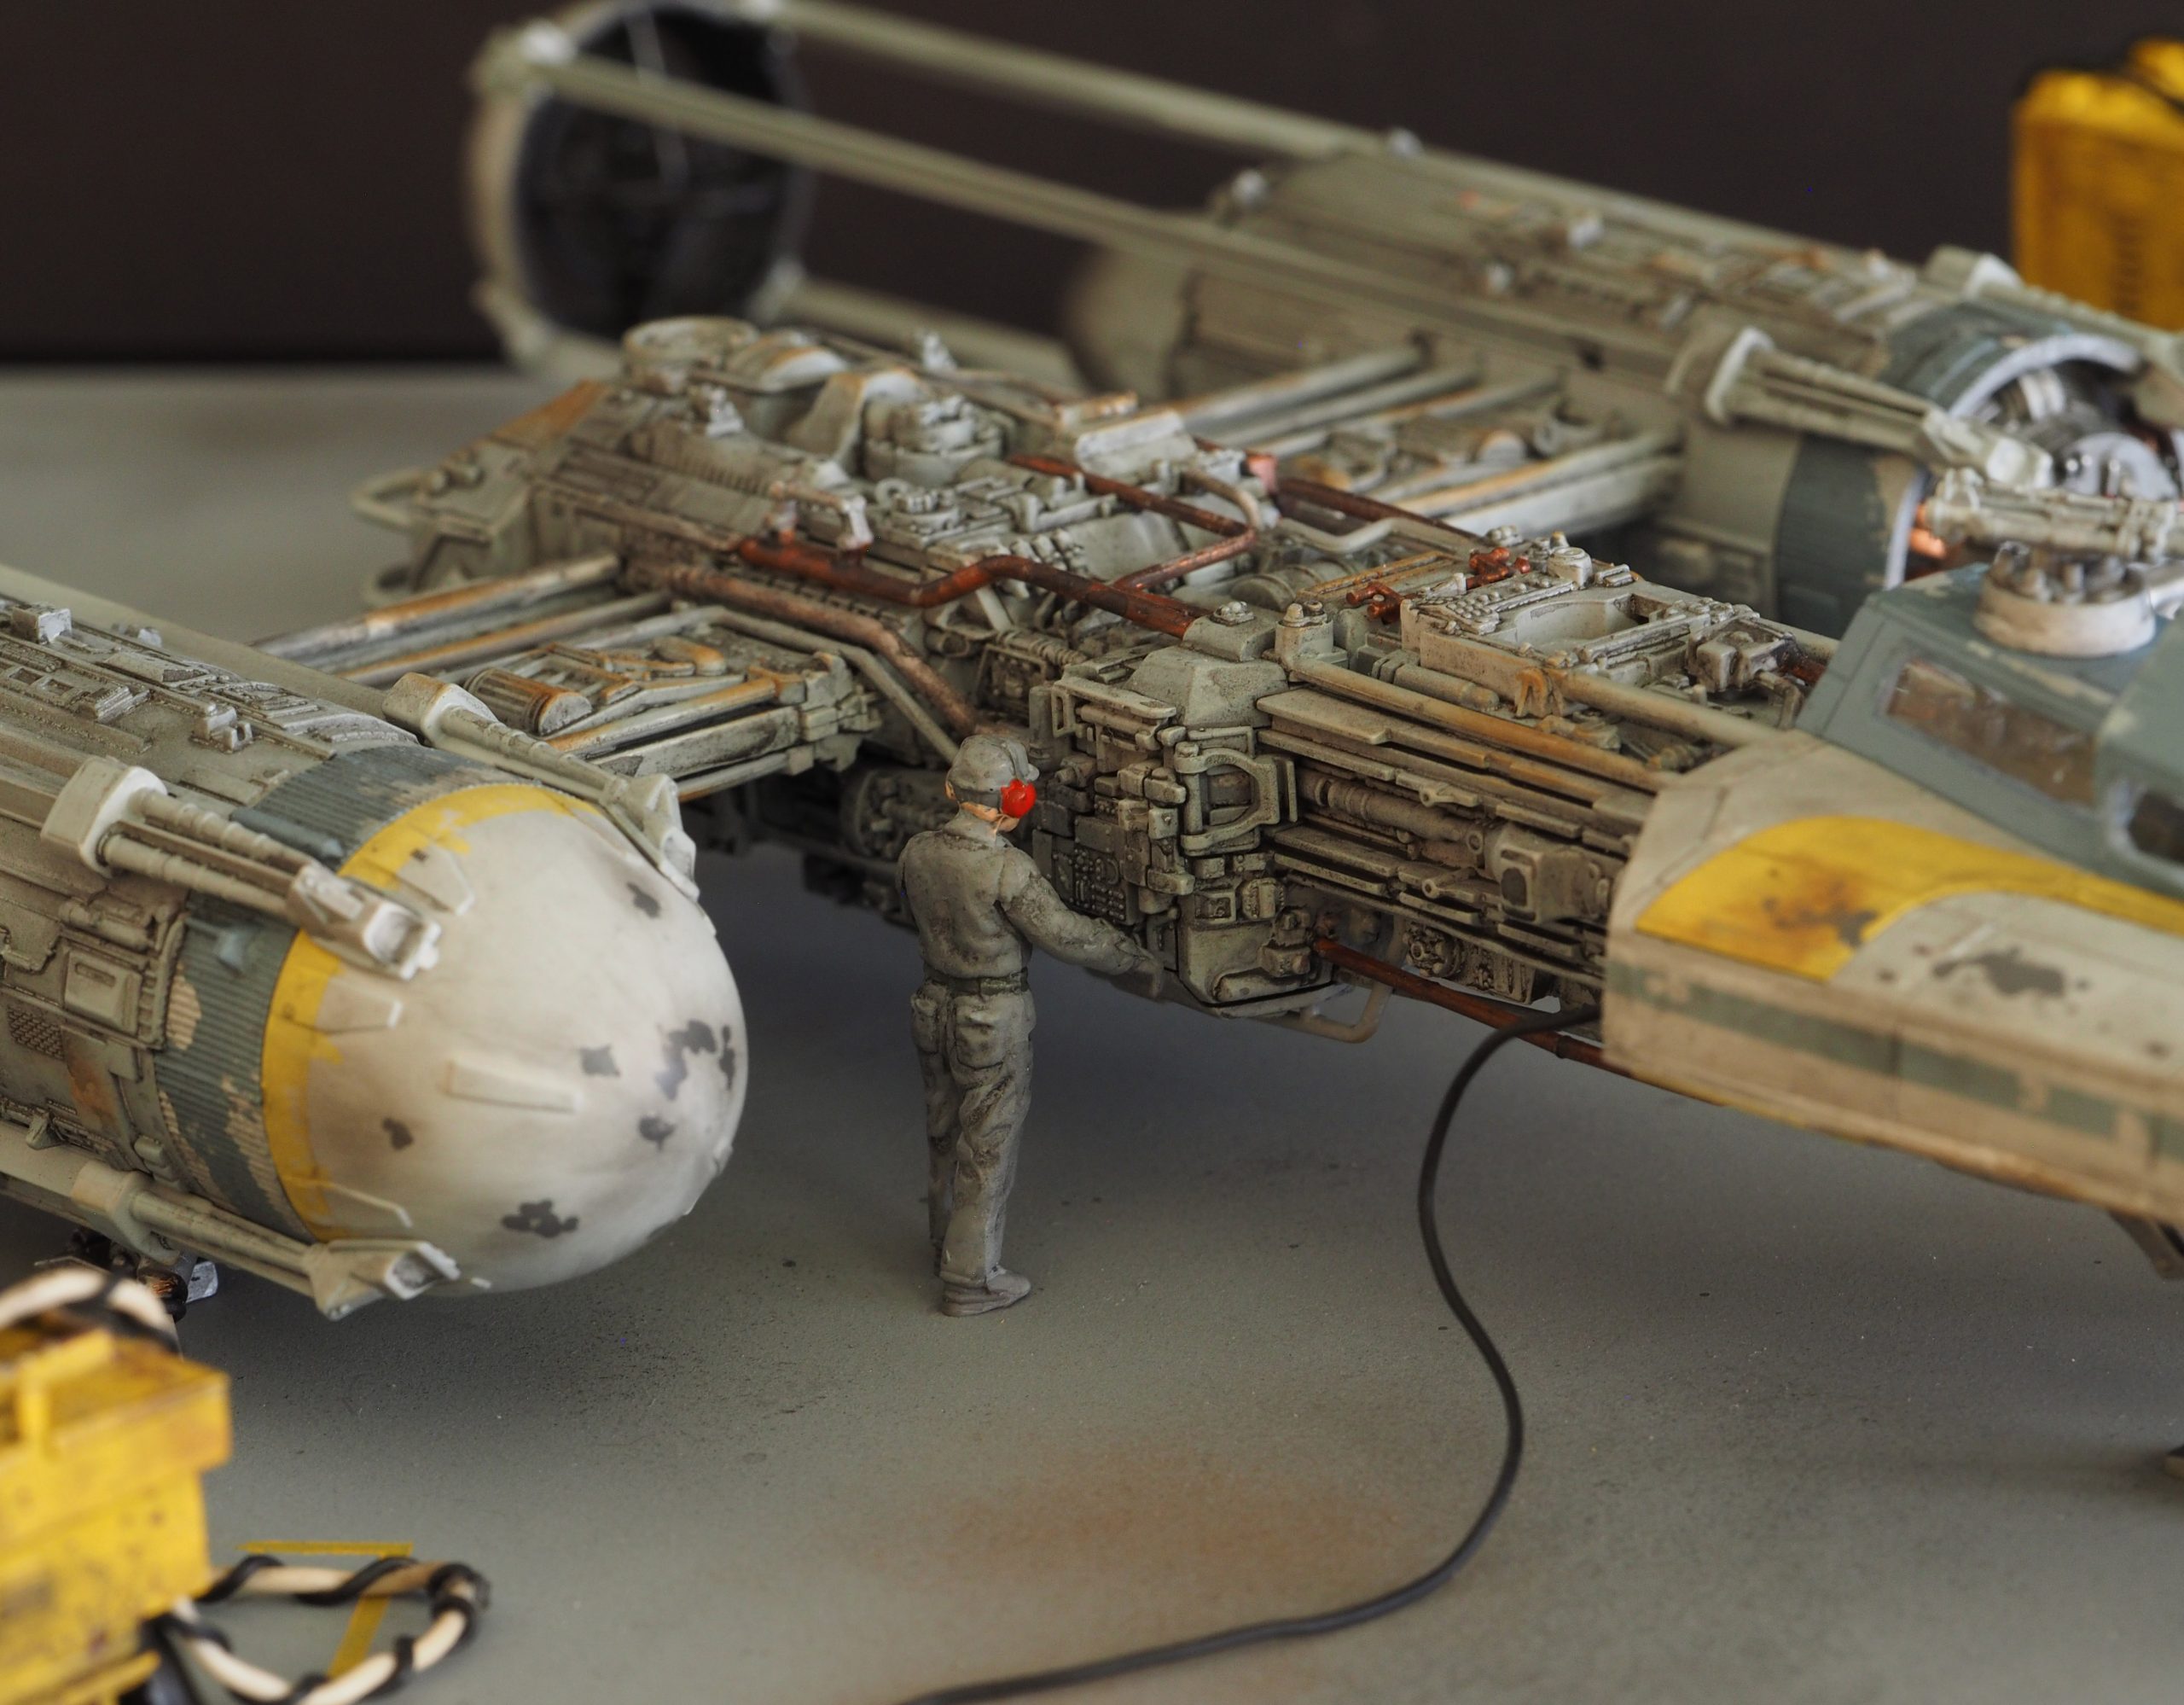
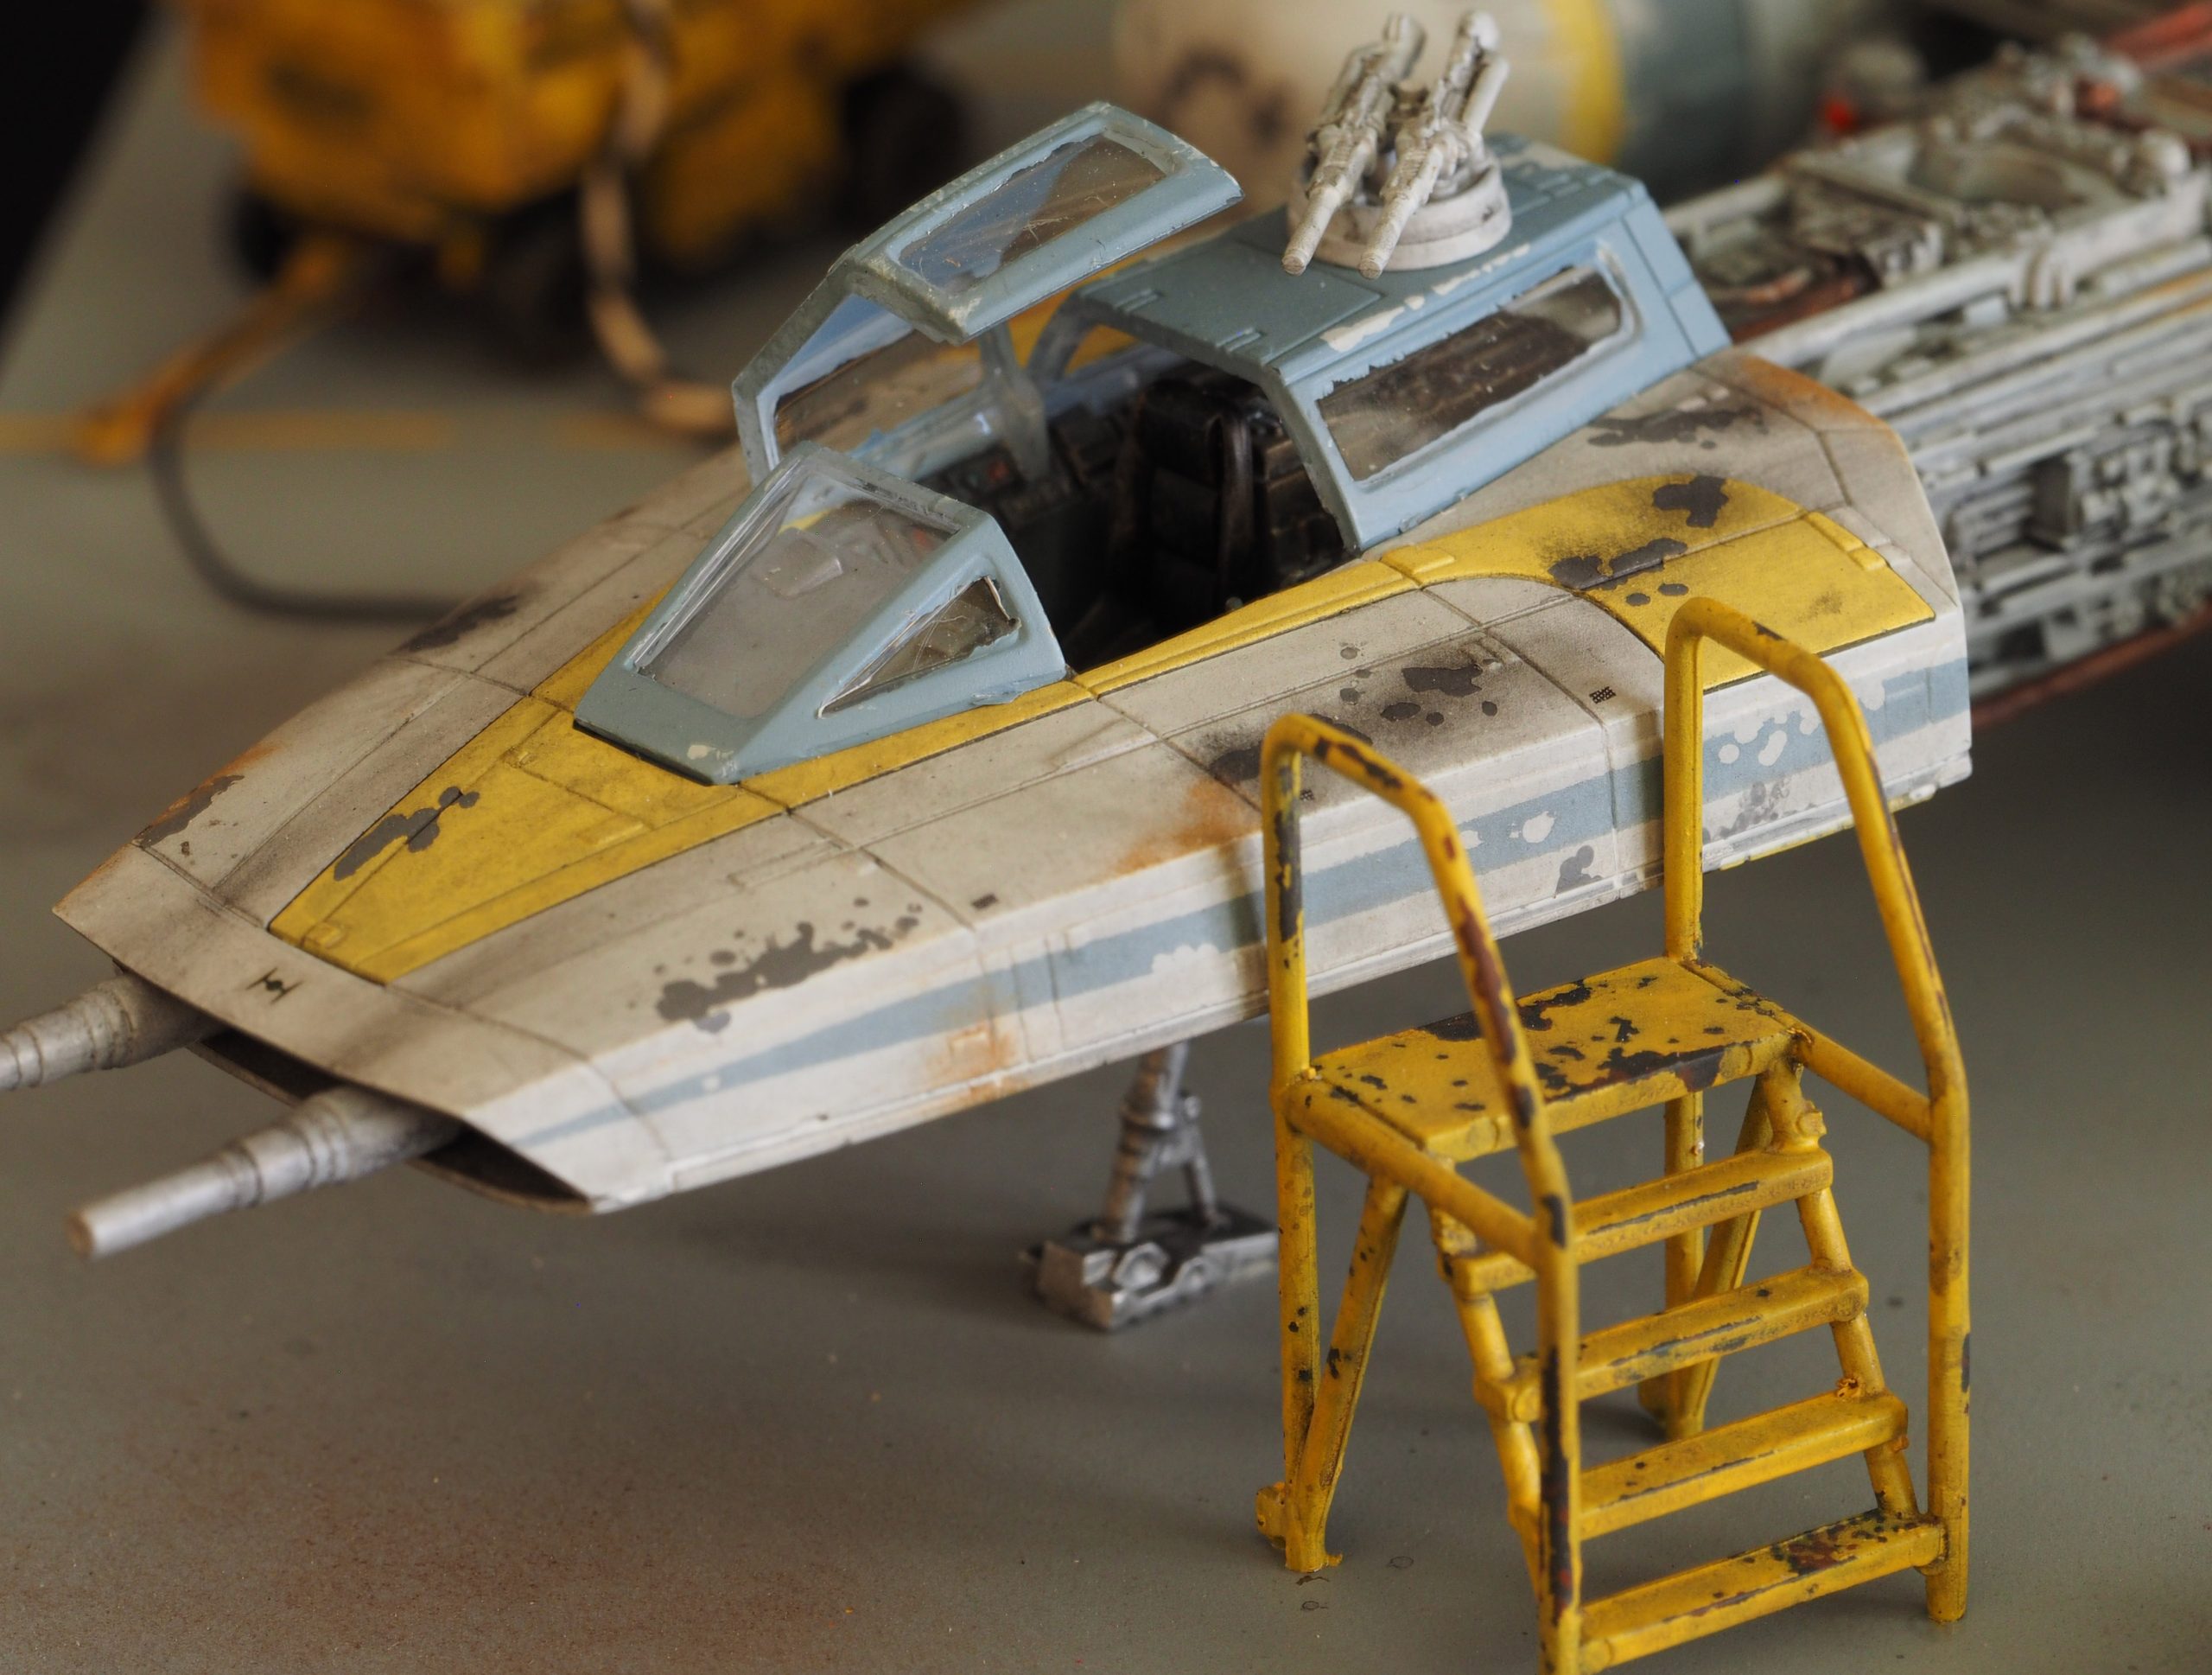
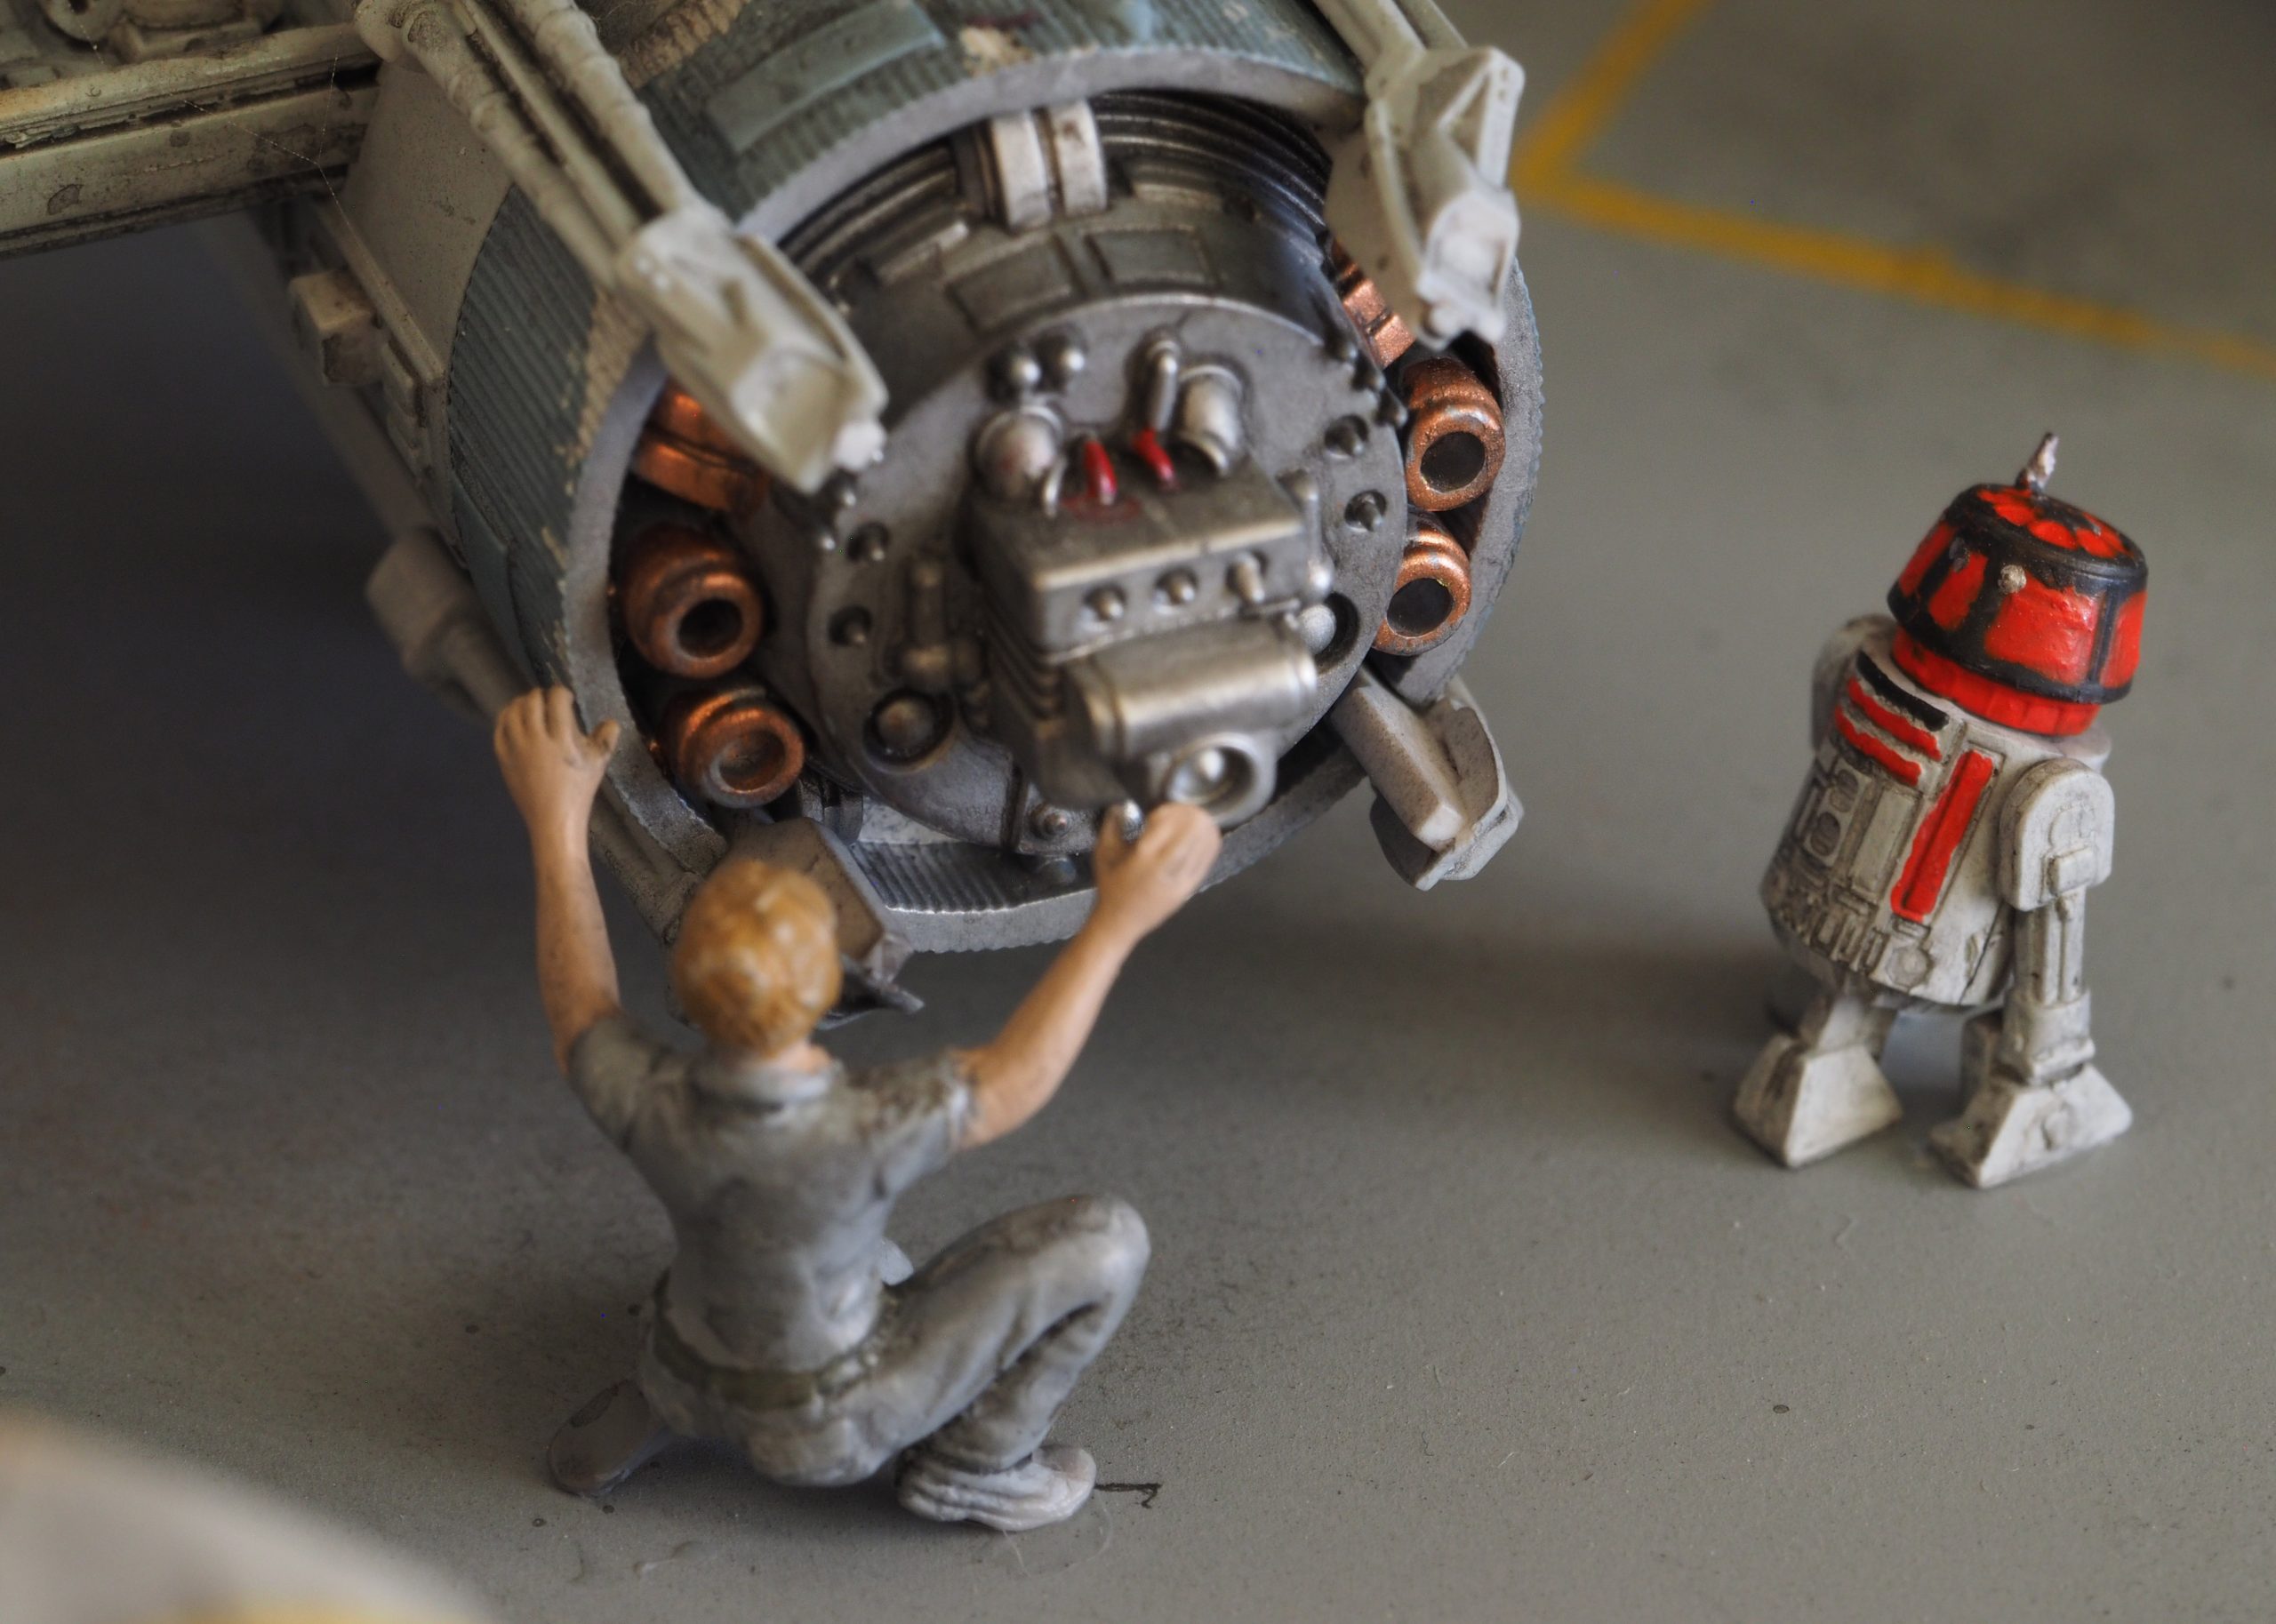
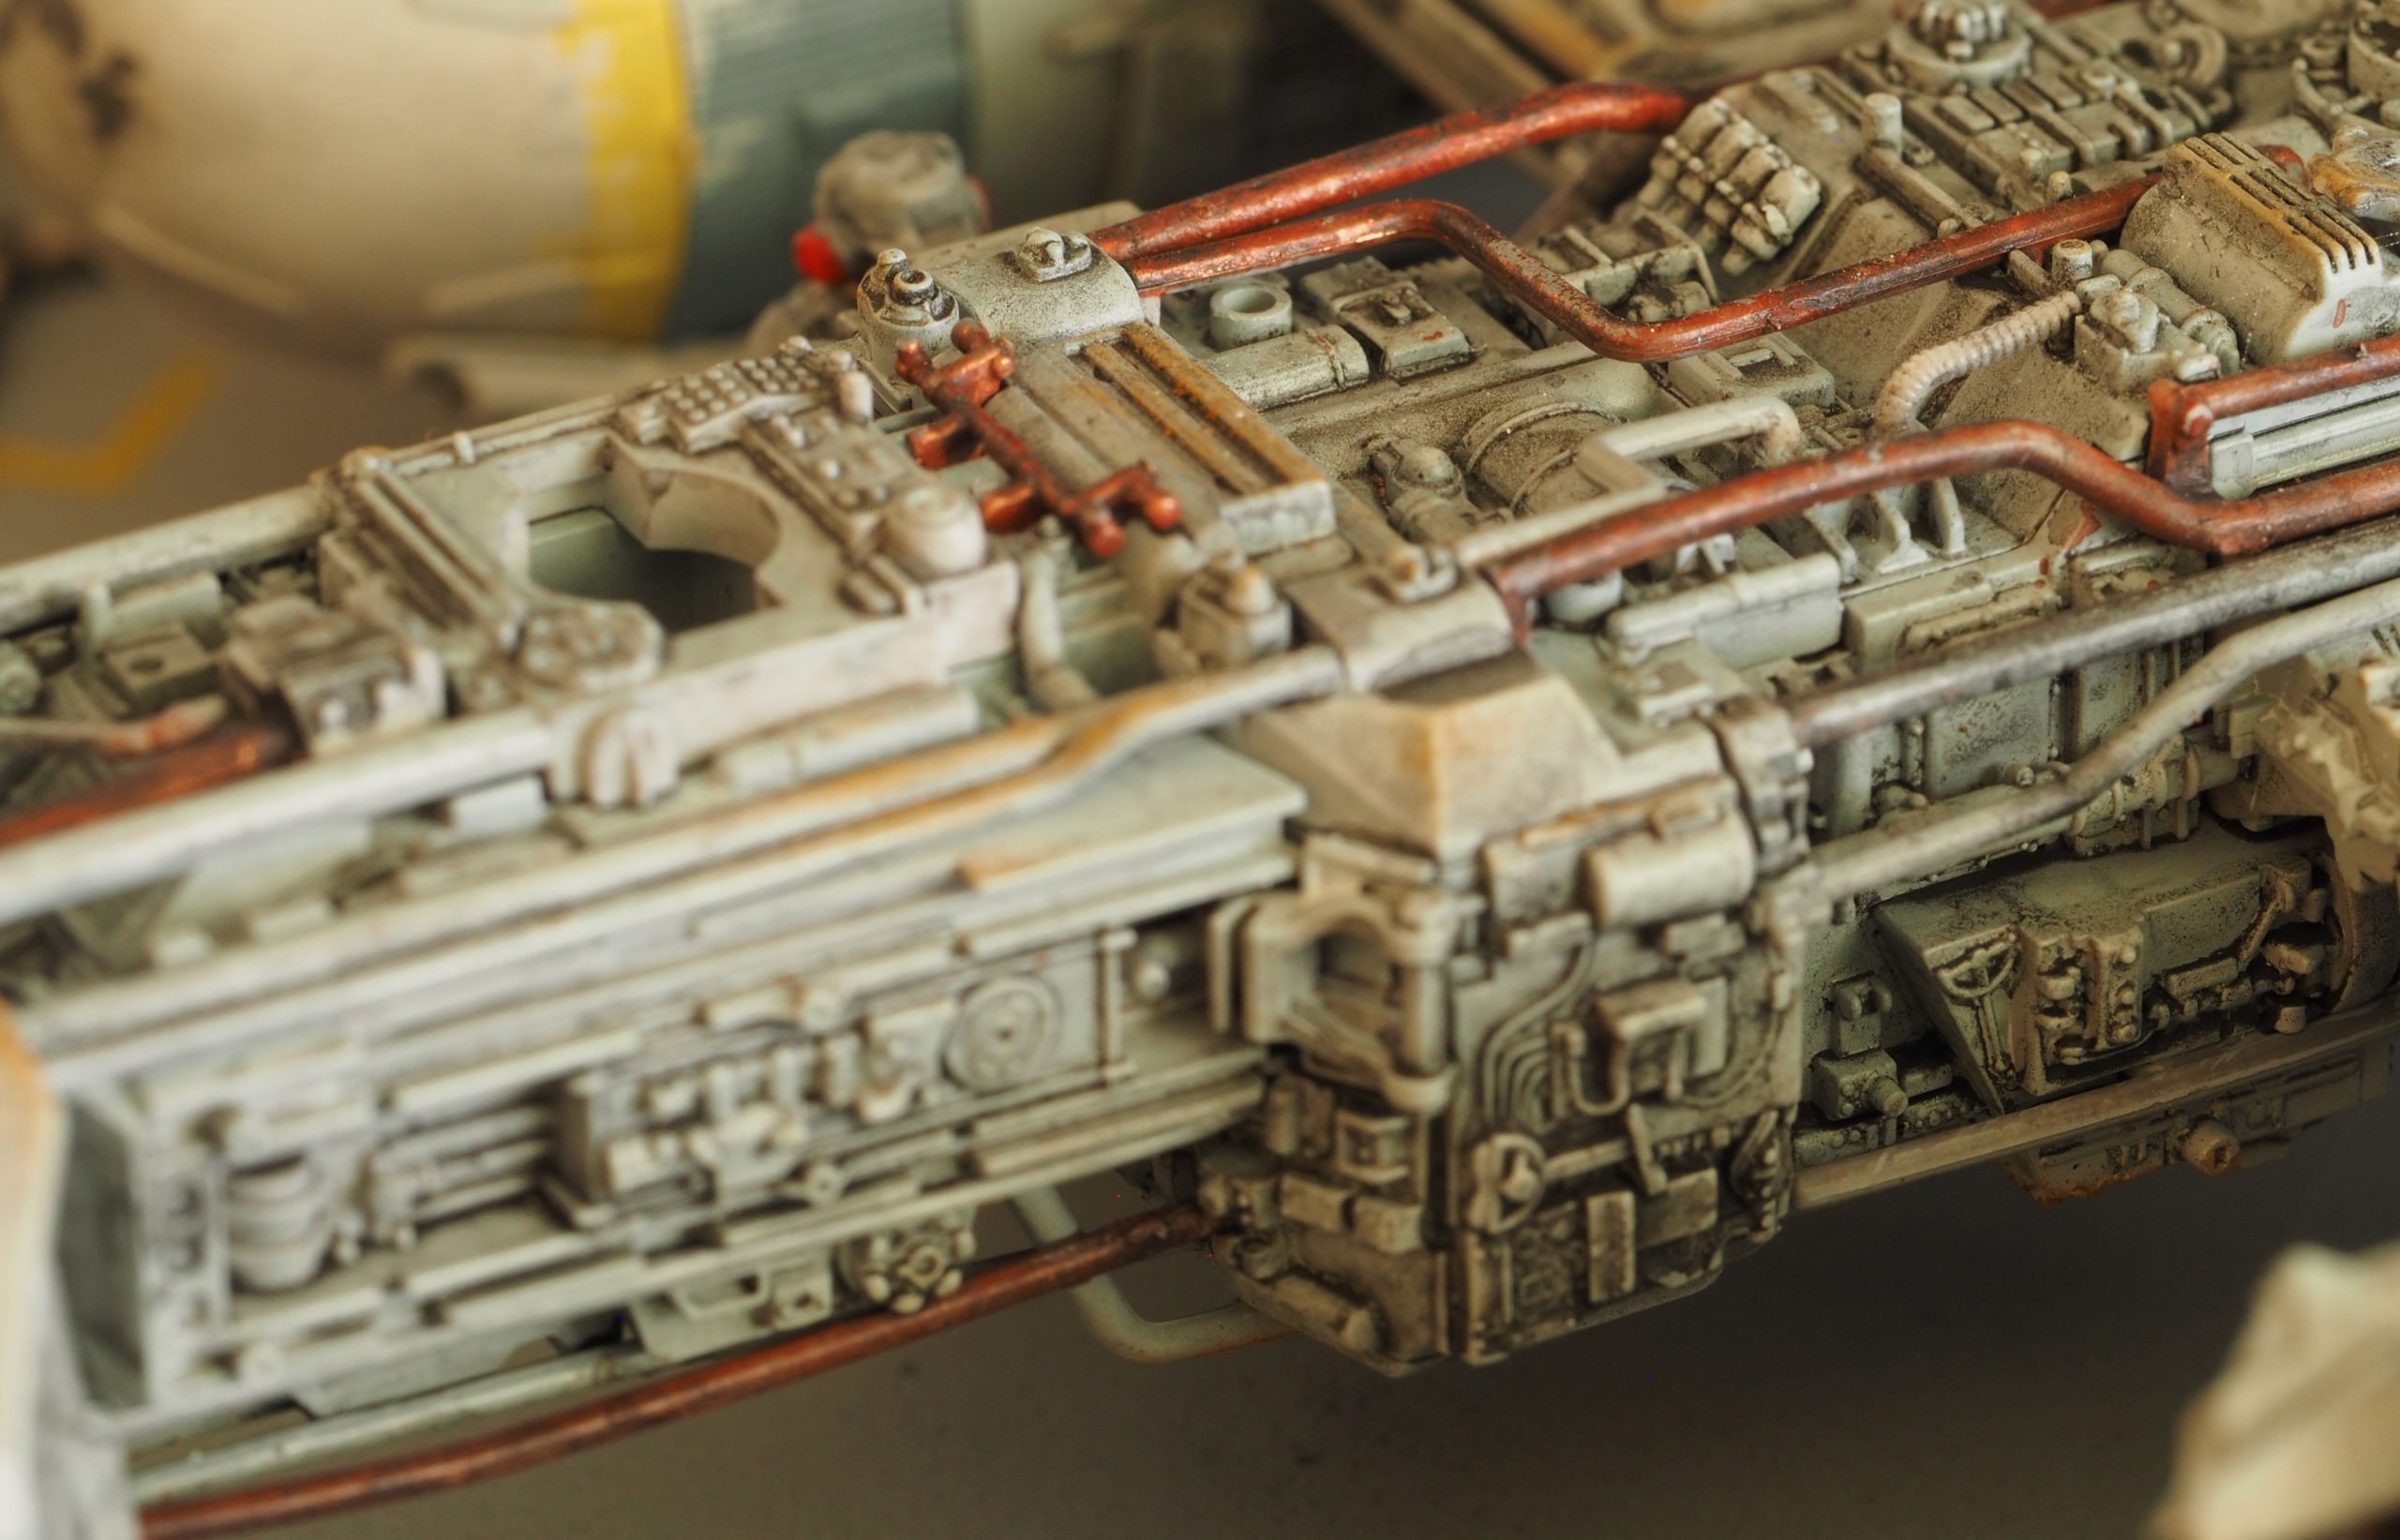
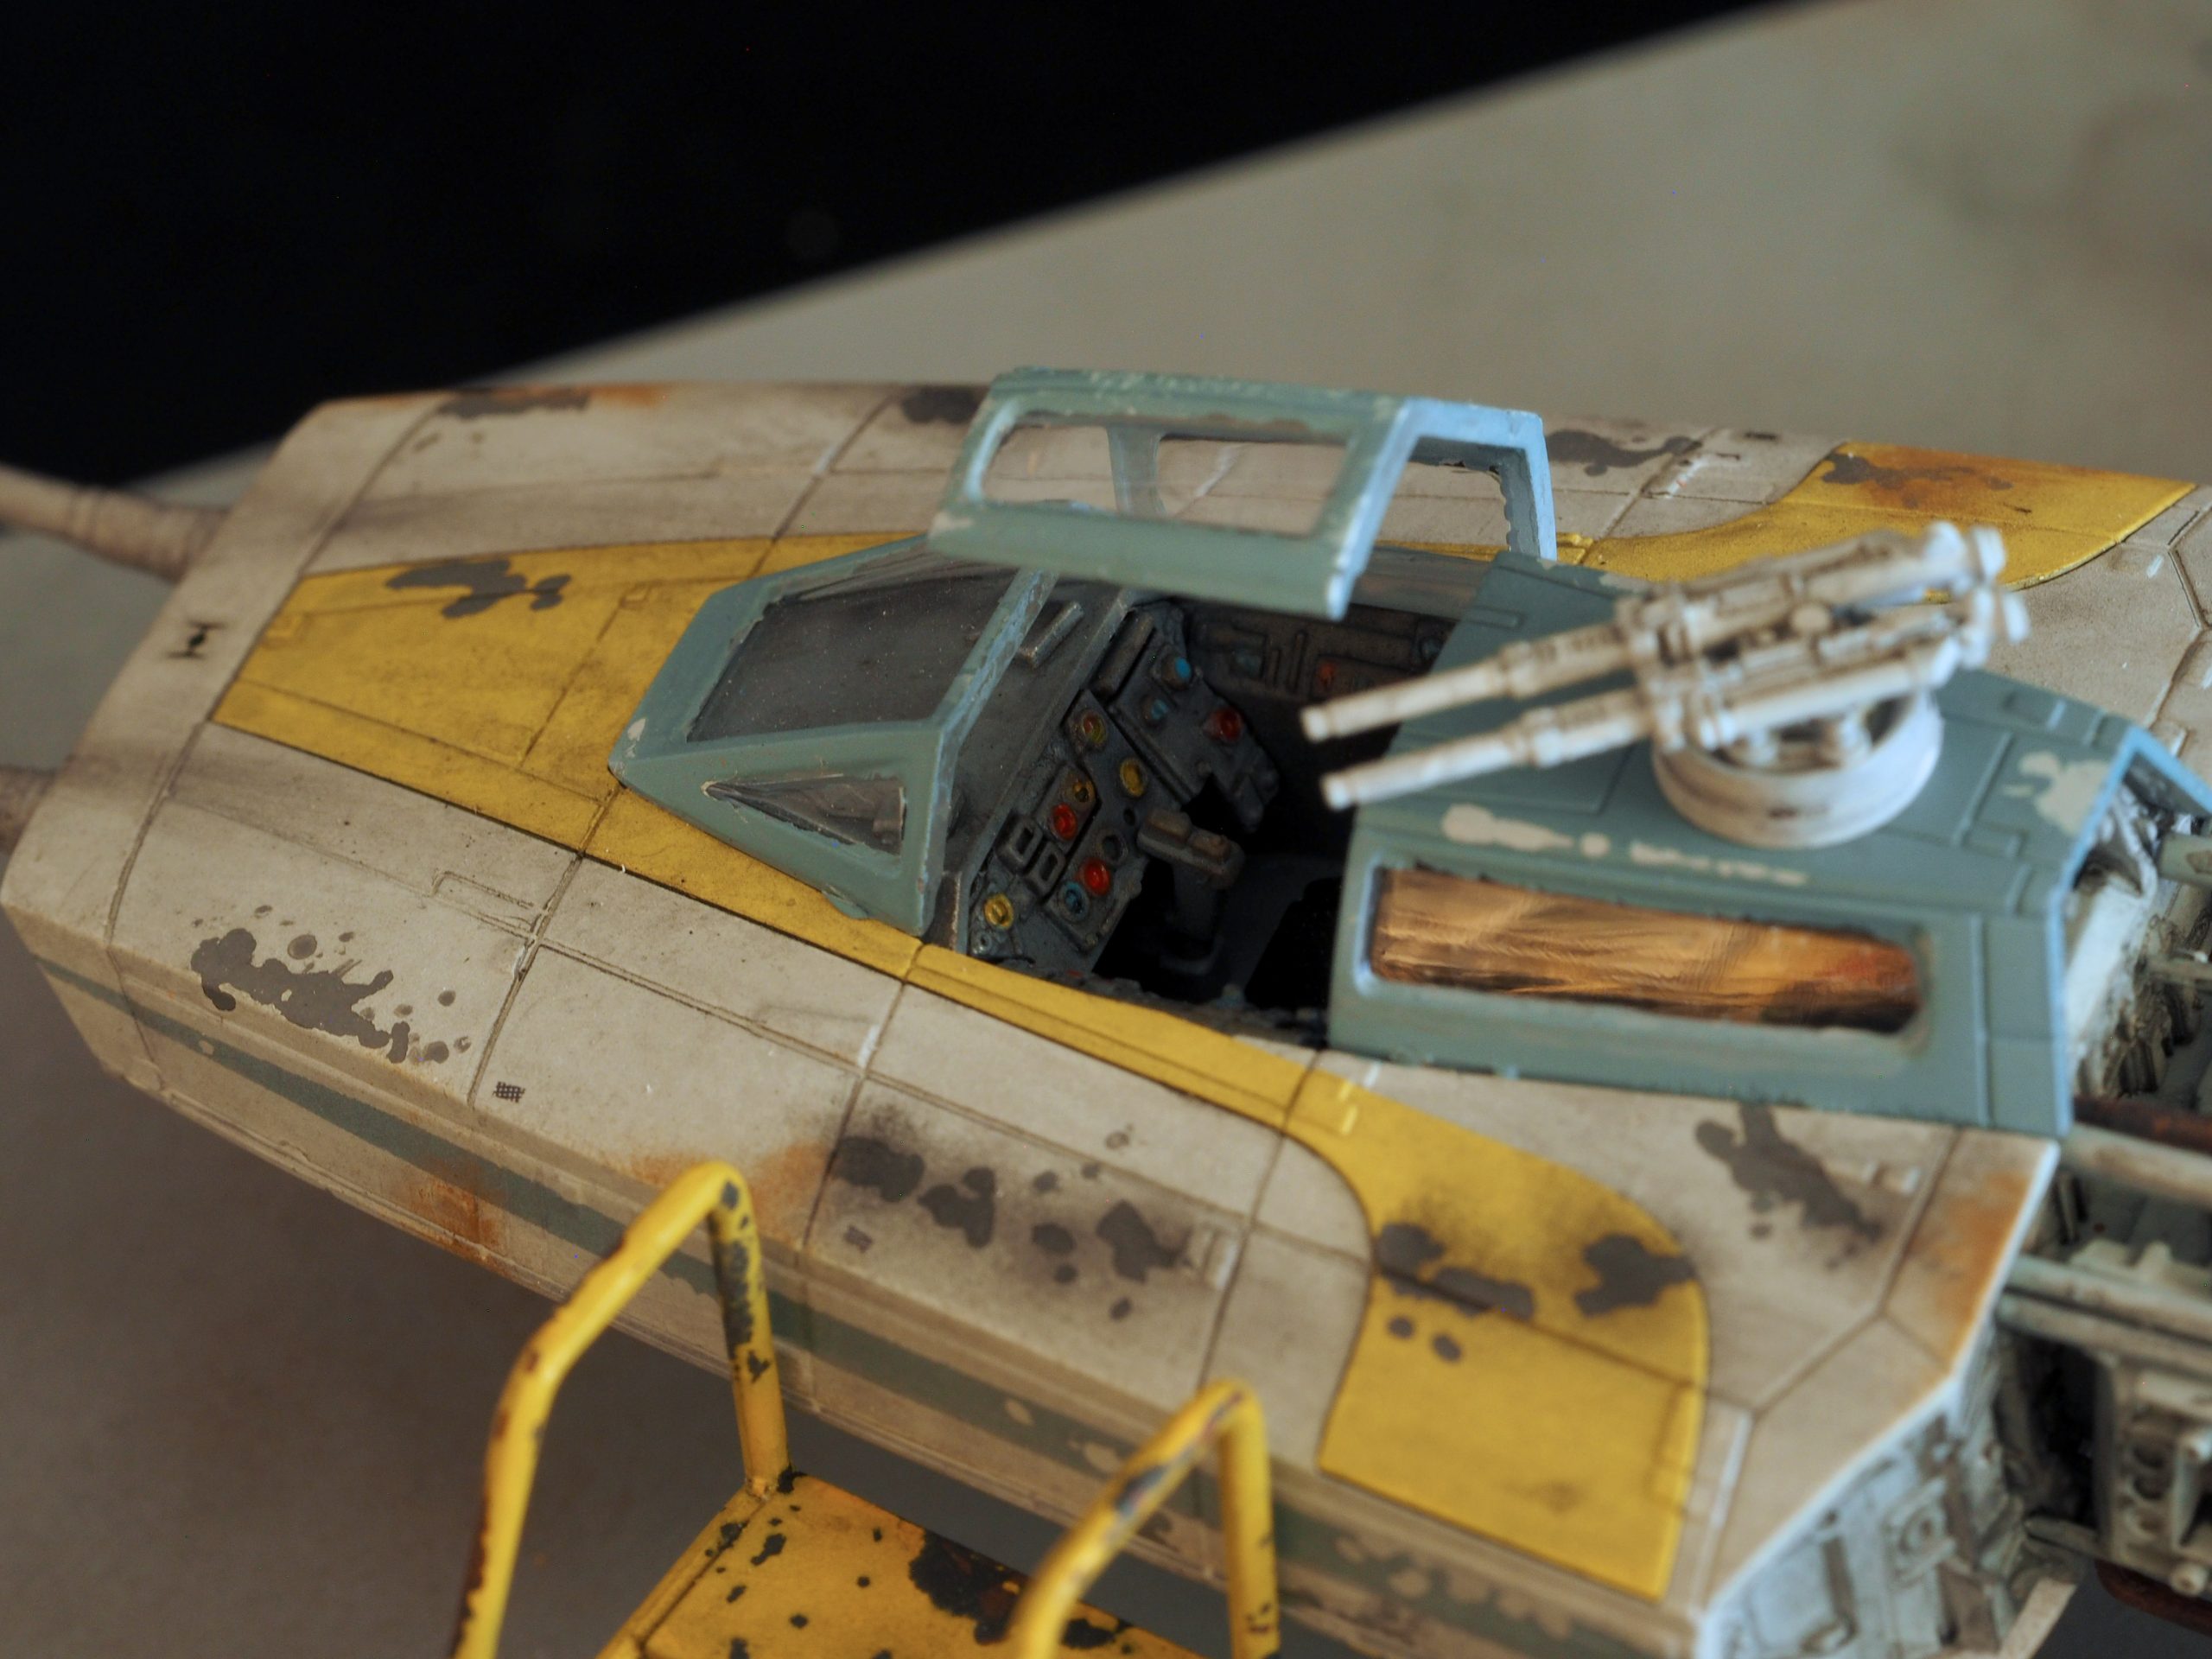
Upon opening the box you’ll find a highly detailed fuselage, a front nose section with crisp panel lines, and many other fine parts. The parts come colored so one could get away without any painting if desired. The choice is available for the modeler to build it in the open or closed cockpit configuration and they even include interior detailing for the engines (under the nacelle caps). The engine detailing is so nice I decided to leave one nacelle with cap off just to show it off. Lastly, the model comes with a stand that resembles the surface of the Death Star.
My plan
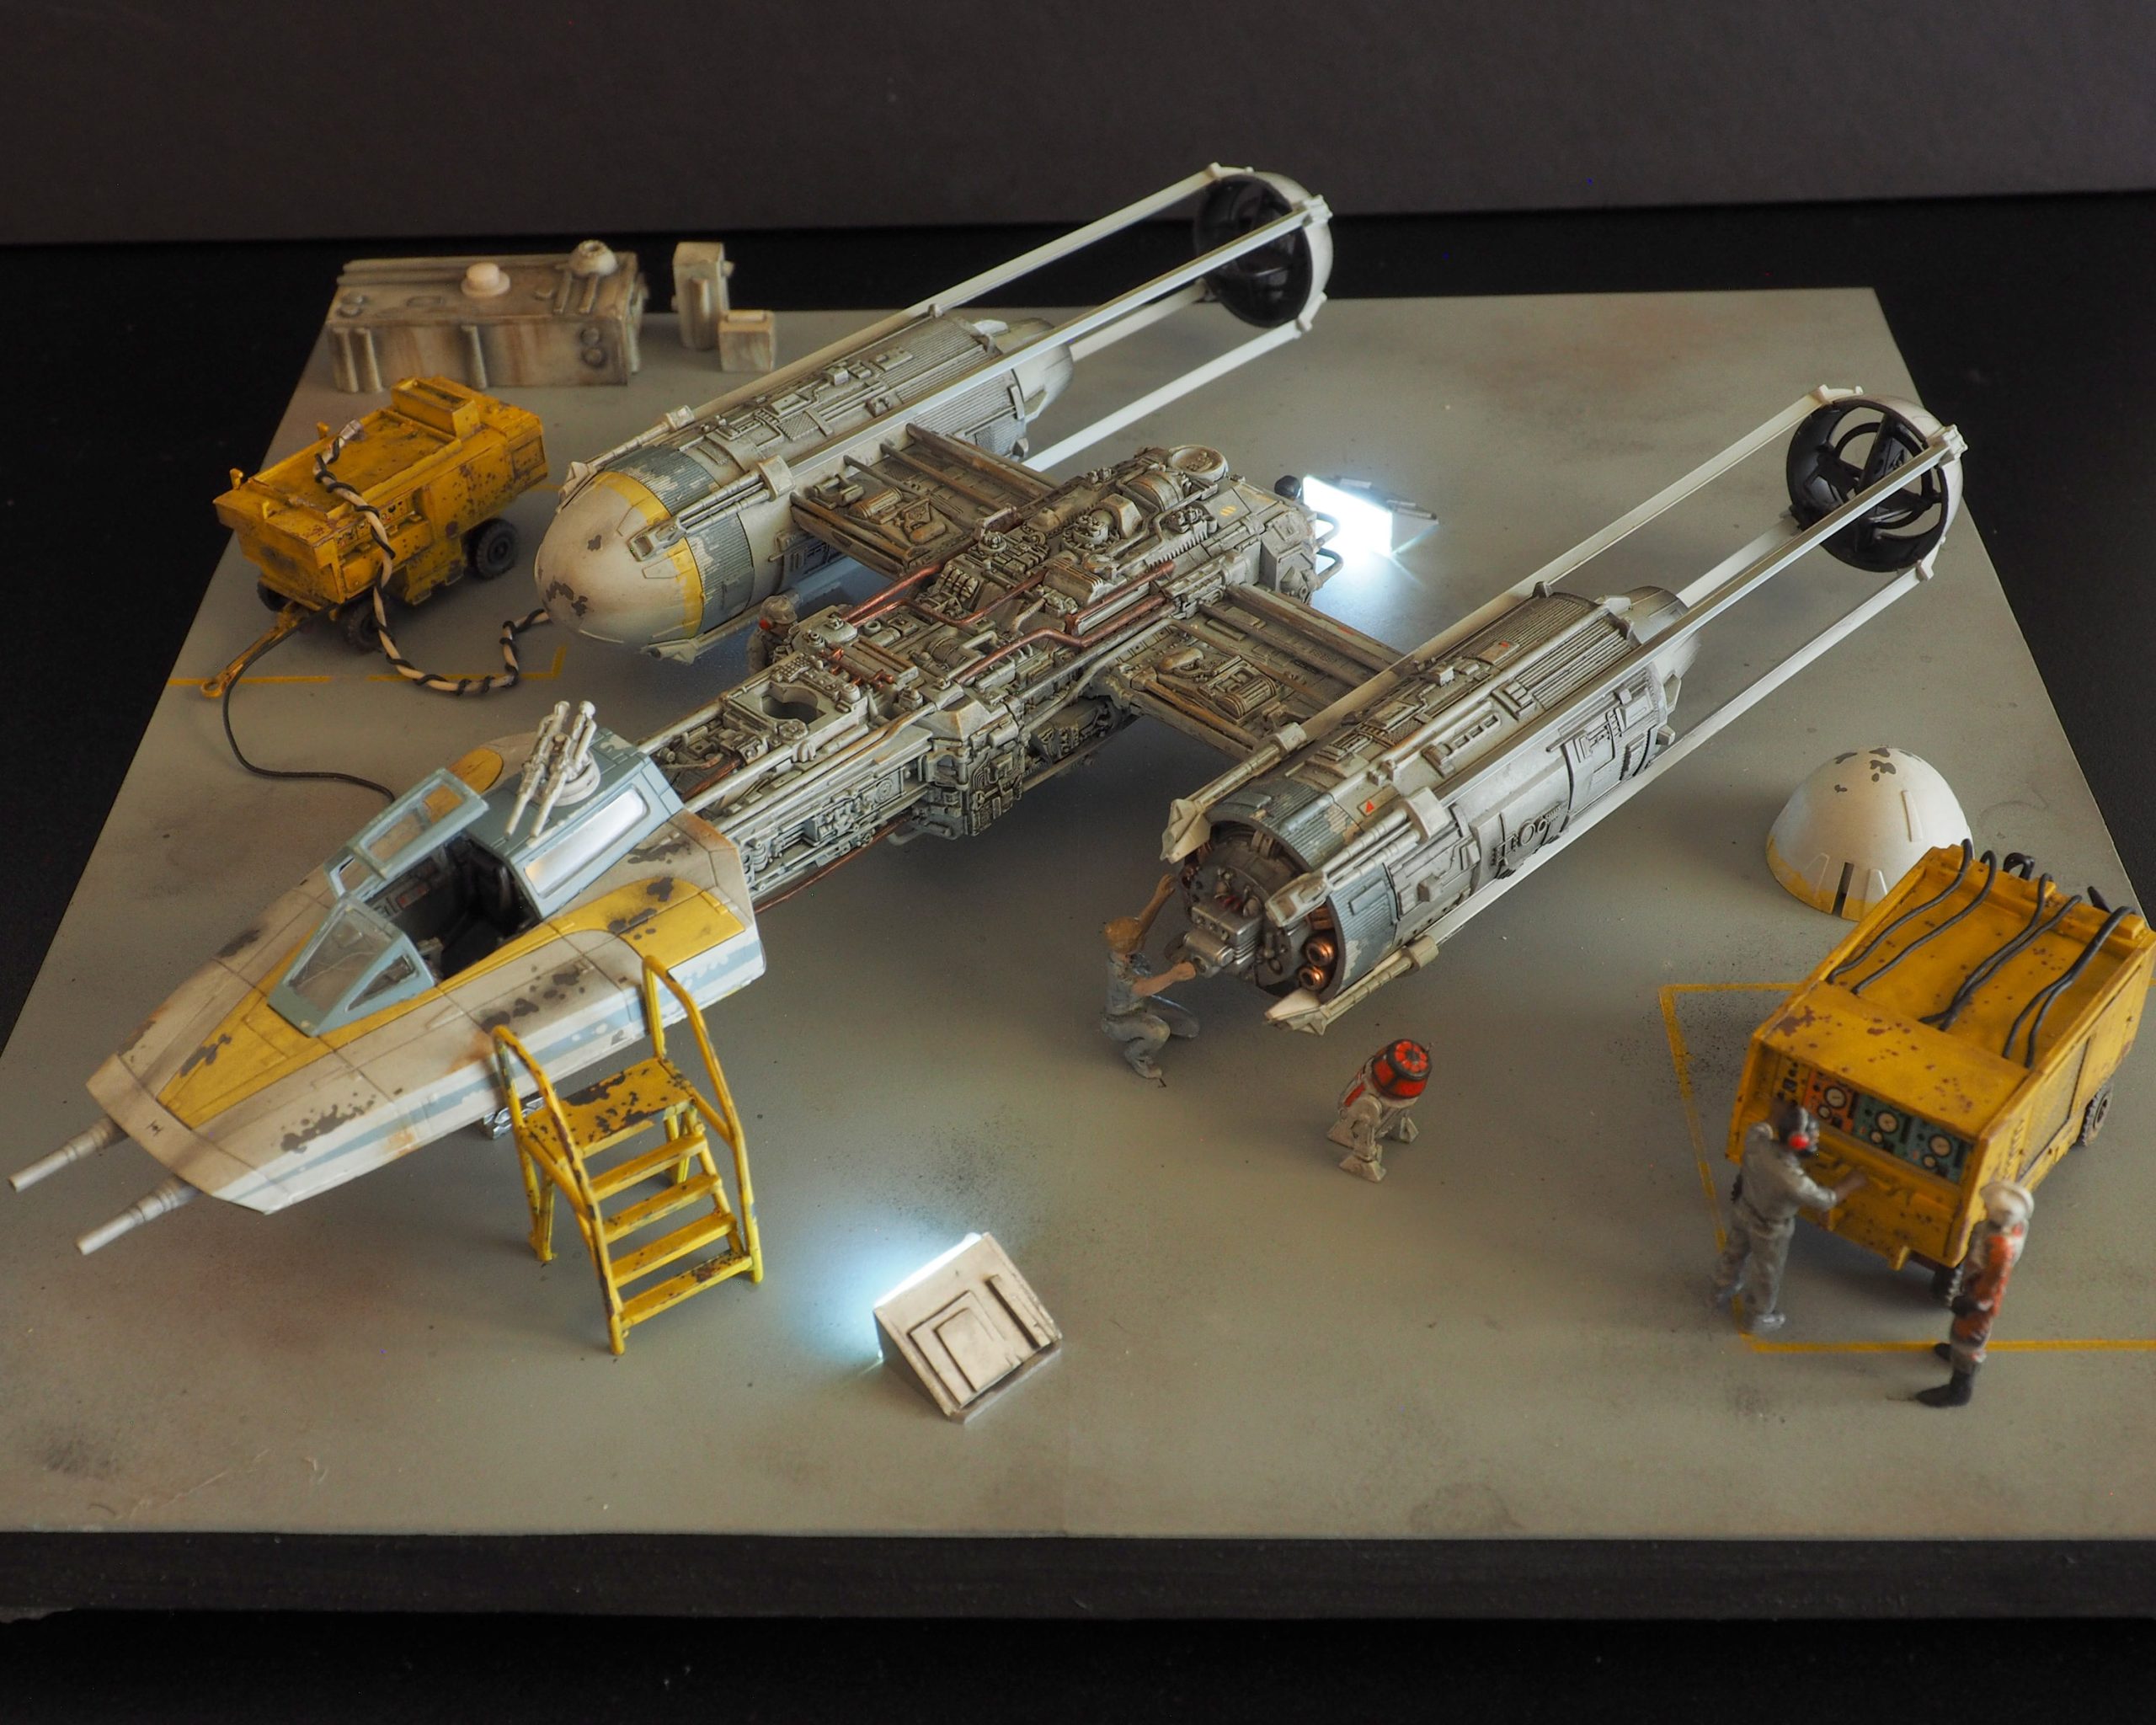
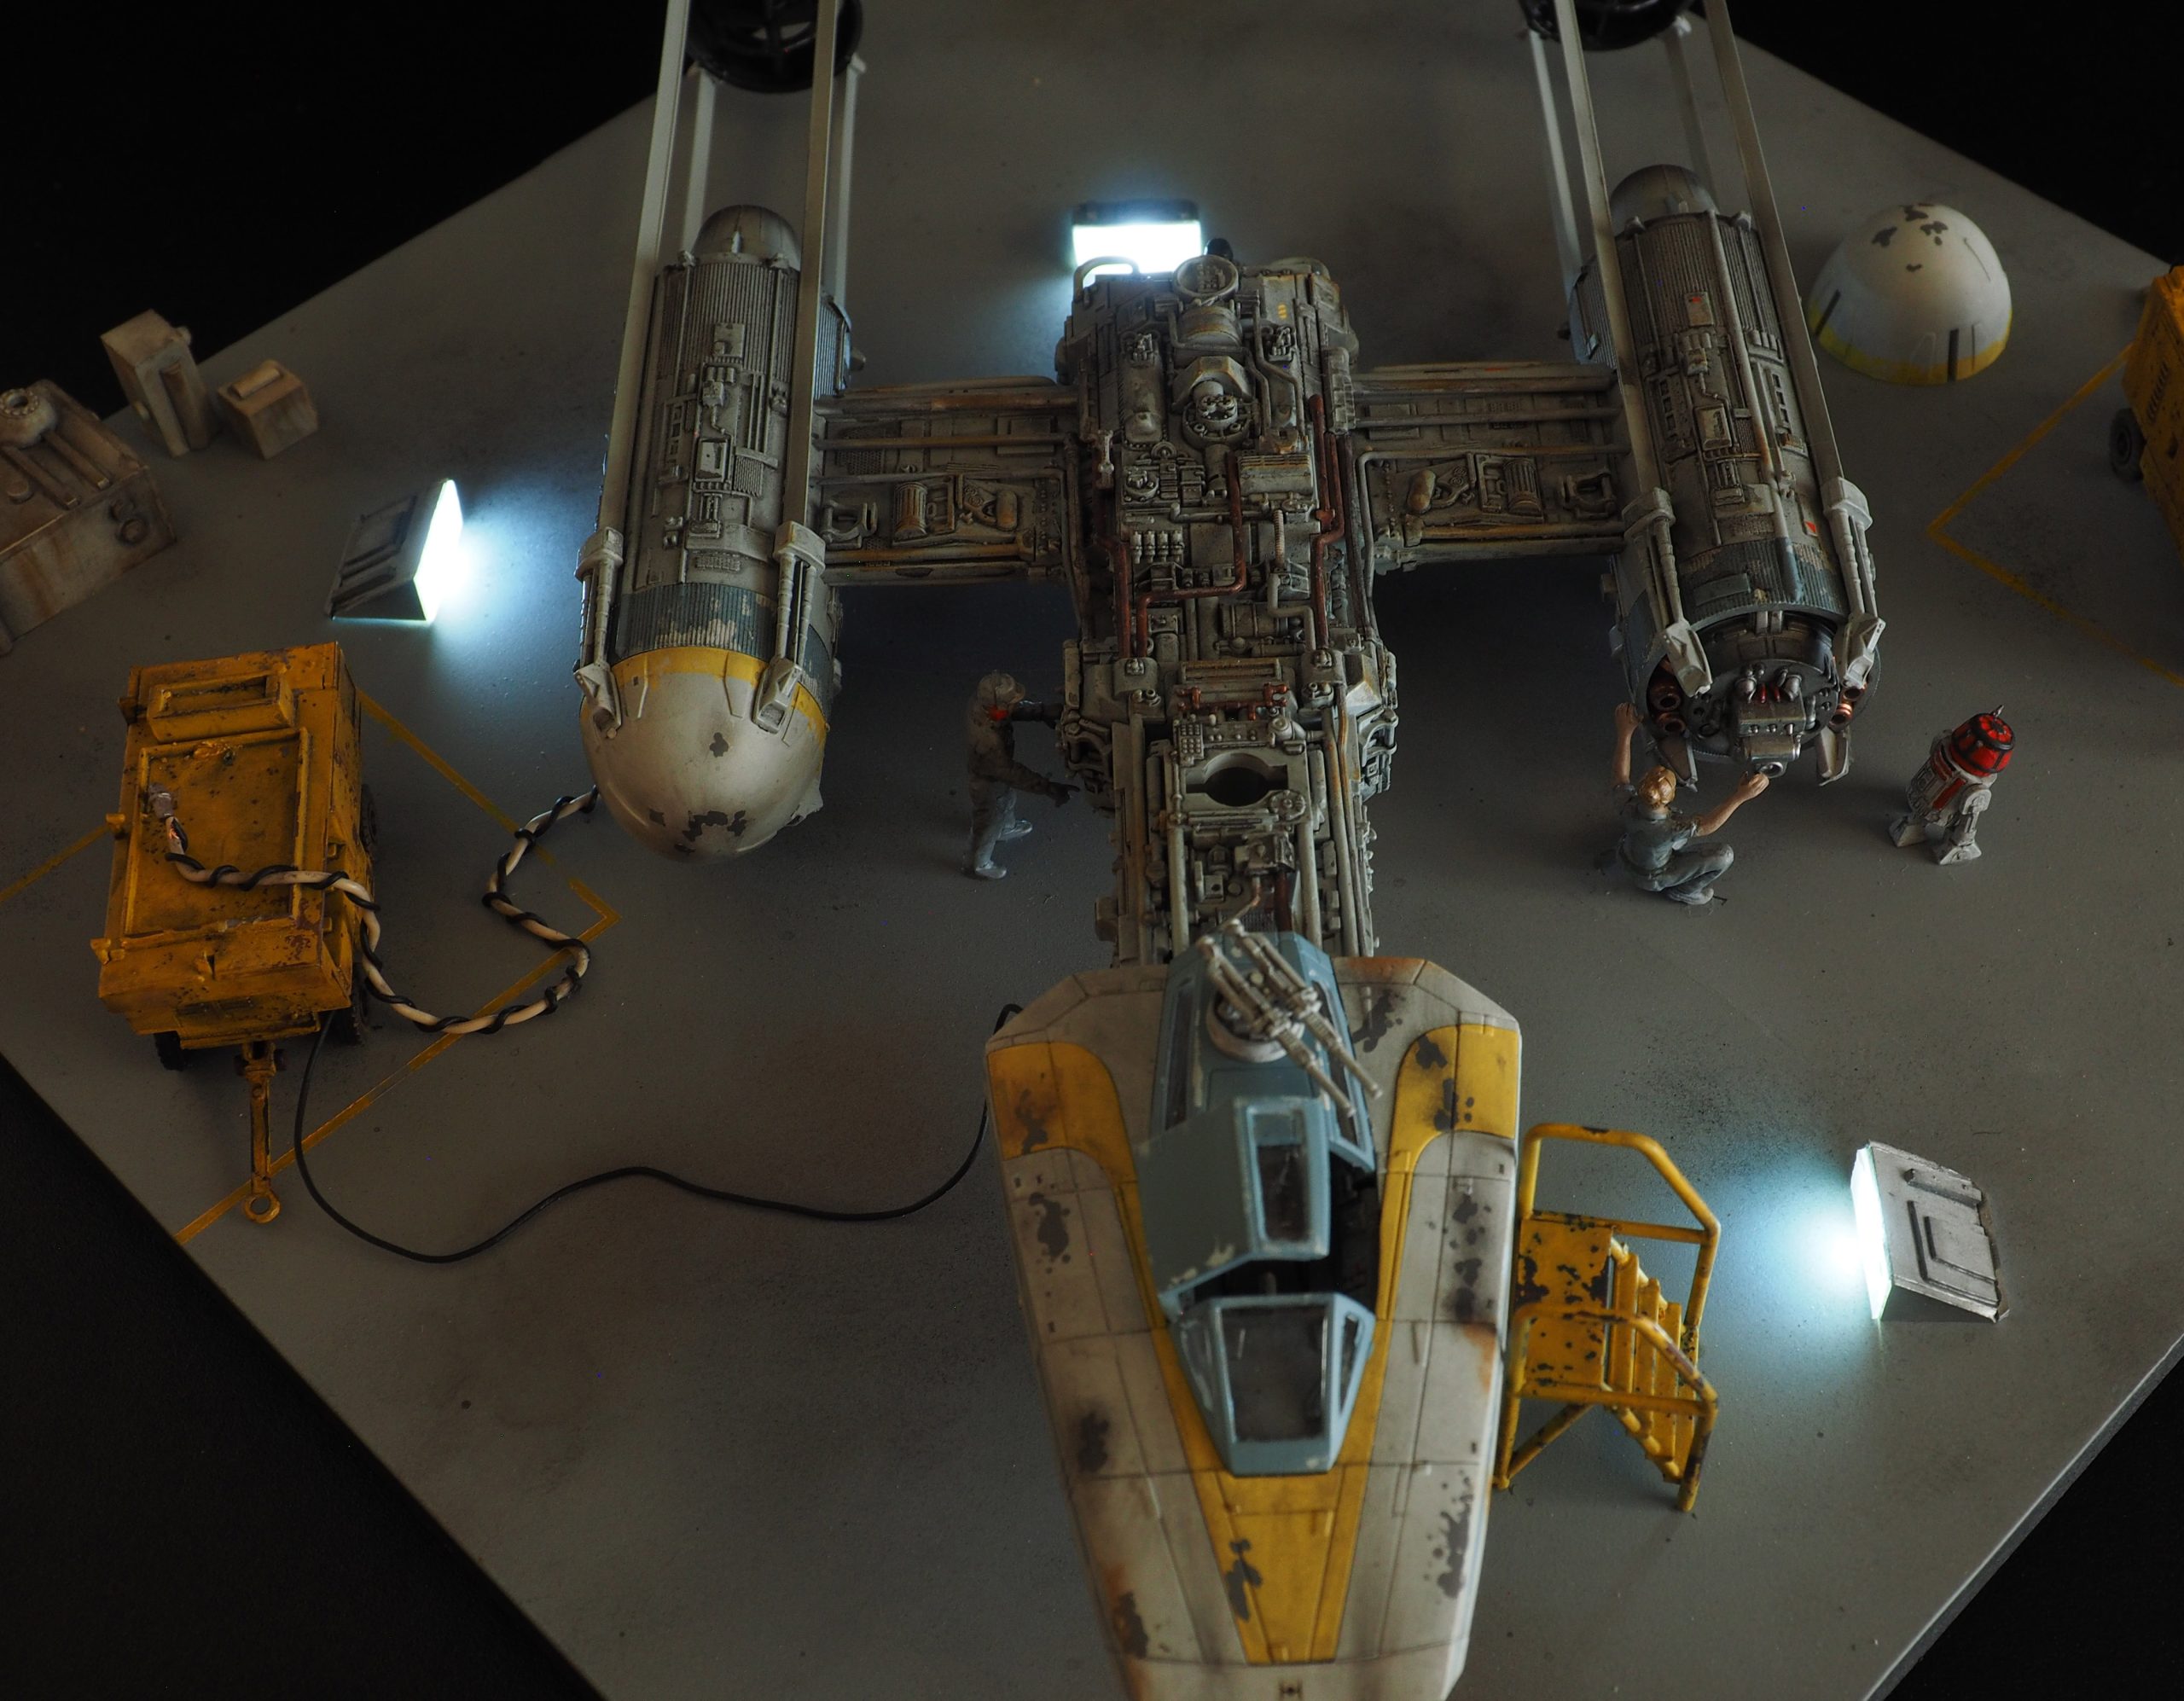
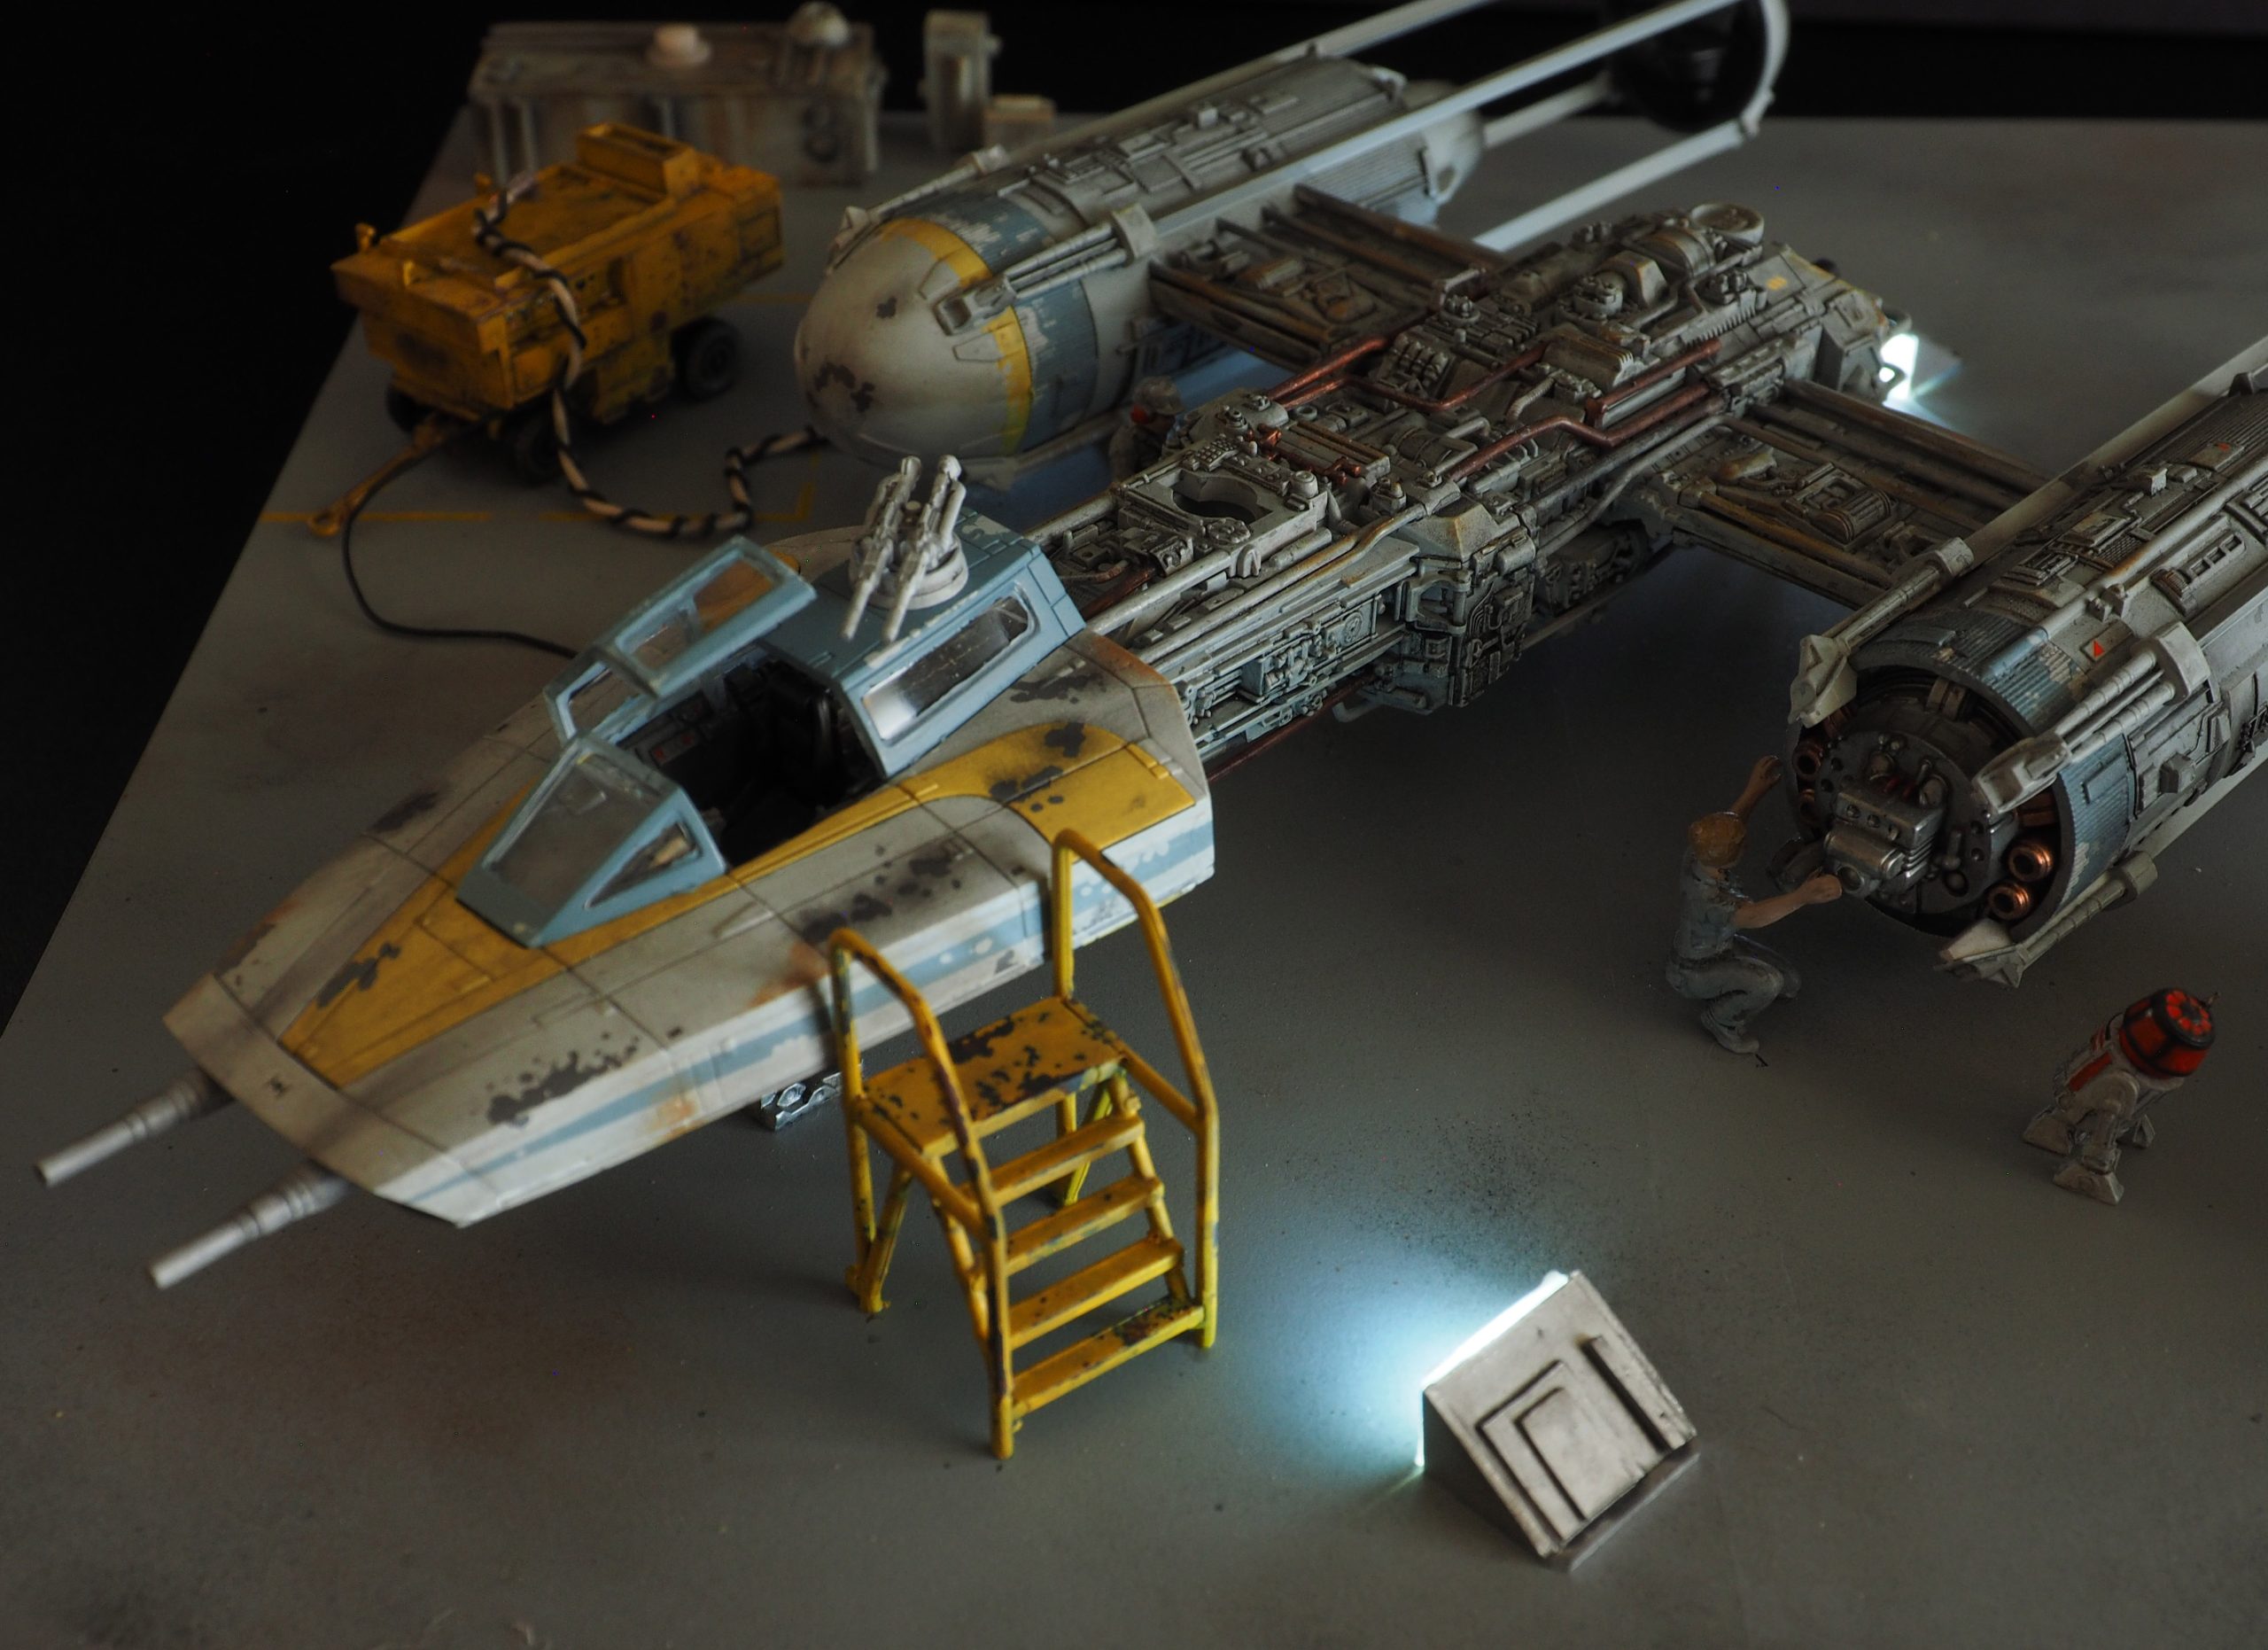
I have wanted to try a small-scale diorama for some time and this provided a perfect opportunity. I decided to build the model in the landed configuration with an open cockpit surrounded by ground crew and equipment. I looked online for a 1/72 scale ground crew and purchased the Hasegawa US Aerospace crew and equipment set. I bought the kit on ebay and it came with 5 pieces of equipment along with 4 figures. As for lighting, I decided not to light the ship itself but to provide illumination from ground light fixtures similar to ones that were seen in the film.
The build
Overall the build itself was very straightforward. The kit can be pieced together without glue but I did use adhesive on many of the parts, particularly the thin rods and plumbing that are attached to the main fuselage. Applying these thin delicate pieces was the biggest challenge. Care must be taken when handling them because they are susceptible to breaking. Luckily it’s not too difficult to piece them back together should this occur. Attach both ends to the model, realign them and use a small amount of cement. I highly recommend Tamyia’s fine liquid cement for this. The cement comes with a brush applicator you will find extremely helpful.
The larger pieces easily slid together and Bandai was very smart with the placement of the seams. You basically have none to deal with. One interesting thing is they decided to make the yellow marking on the front nose a separate (yellow colored) part rather than a decal. I thought this would create an issue with a visible seam but mine pieced together tightly so there was no further need to do anything. If you end up building this with an open cockpit bear in mind the canopy cover for this option comes in clear plastic so it must be painted and detailed. I found Maskol’s liquid masking fluid very useful for this task.
Because of the fine details, the model lends itself to weathering. Washes and pastels really make the detailing pop so definitely take advantage of it. In the end, you will find yourself with a very nice replica of the ship. I just wish it was larger.
The base
I purchased a wooden 9 X 9-inch square base from Michaels and covered it with a sheet of styrene. This was painted with Vallejo’s medium gray then weathered with pastels. The ground crew and equipment kit provided me the opportunity to improve my figure painting. With the help of my friend Marc Fraley, I employed some different techniques. I first started with applying the base color followed by a wash then brushing on some highlights. The same steps were followed with the Y Wing pilot figure as well as the R2 unit. In the end, I was really pleased with the results. These simple techniques gave more character and dimension to my figures and was well worth the time and effort.
I chose two pieces of equipment from the Hasegawa set and used the salt and hairspray technique to weather them. The pieces were first painted with a rust color followed by the application of hairspray and salt. Once dried I used Testors acrylic chrome yellow as the main color. The salt was dissolved and what resulted was a nice weathered appearance. I further applied pastels and a wash.
As for the lighting, those fixtures are scratch-built using pieces of styrene plastic. The triangular fixtures were then painted with Tamyia’s mica silver then covered with a black wash. I then mounted chip-sized SMDs from modeltrainsoftware.com then glued the fixtures over them after gluing on some frosted styrene to act as diffusers. The lights were wired to a push switch which was concealed in a scratch-built piece. I designed it to resemble something from the SWars universe and it worked perfectly.
Overall I was very happy with the end result. The diorama depicts a scene with a Y Wing under repair showing off much of the exquisite surface detailing of this excellent Bandai kit. I’d highly recommend the kit. It really is a nice representation of this iconic starfighter.